Shopify Language Change: A Step-by-Step Guide [No App Required]
in Shopify, Shopify Customization on July 10, 2024by Mosfequr RahmanShopify language change is a crucial step for expanding your store’s accessibility and enhancing user experience. By offering multiple languages, you can cater to a global audience, making your store more user-friendly for non-native speakers. In this article, we will guide you through the process of changing the language of your Shopify store without the need for any additional apps. Follow these simple steps to add and activate new languages on your storefront.
Shopify Language Change Step by Step
Shopify language change can be easily managed by following these steps to add and change languages on your store, we will show language add on the announcement bar:
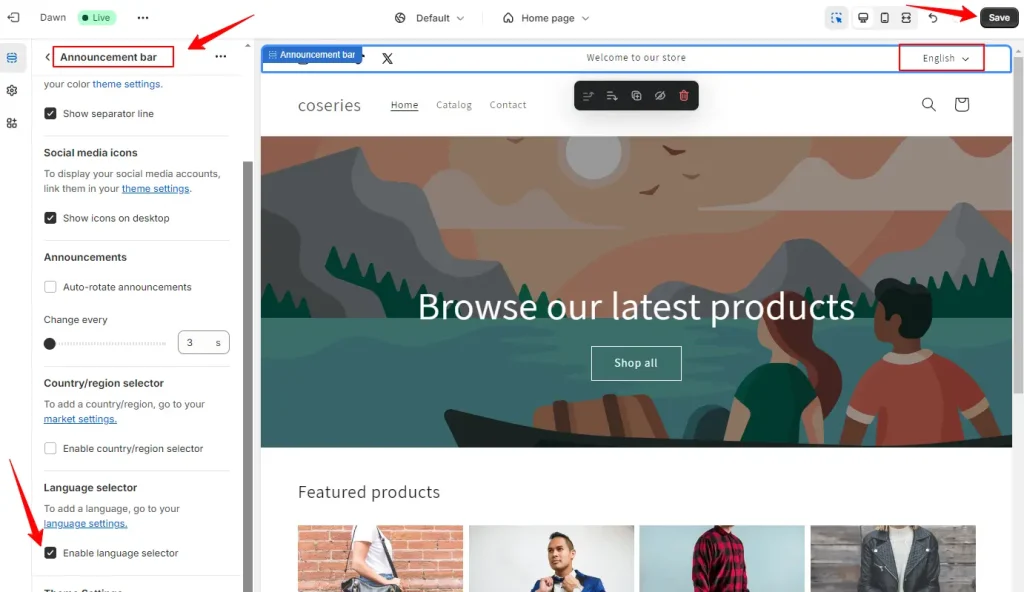
To activate the Language on Announcement bar, Log in to Your Shopify Admin navigate to Themes > Customize > Announcement bar, and then enable the language selector option.
Afterward, click the Save button to apply your changes.
NB: If more than one language is added to the store, it will be displayed as a dropdown. Otherwise, it will not be shown.
By offering our products and services in multiple languages, our store will become accessible to a broader audience. This includes customers who are more comfortable browsing and shopping in their native language. As a result, we can increase our customer base and significantly enhance the overall user experience for non-native speakers.
If you want to reach a broader audience by selling your products in multiple languages, please follow the steps provided below to add additional languages to your Shopify store.
Step 1: Log in to Your Shopify Admin
First, log in to your Shopify admin dashboard using your credentials.
Step 2: Access Settings
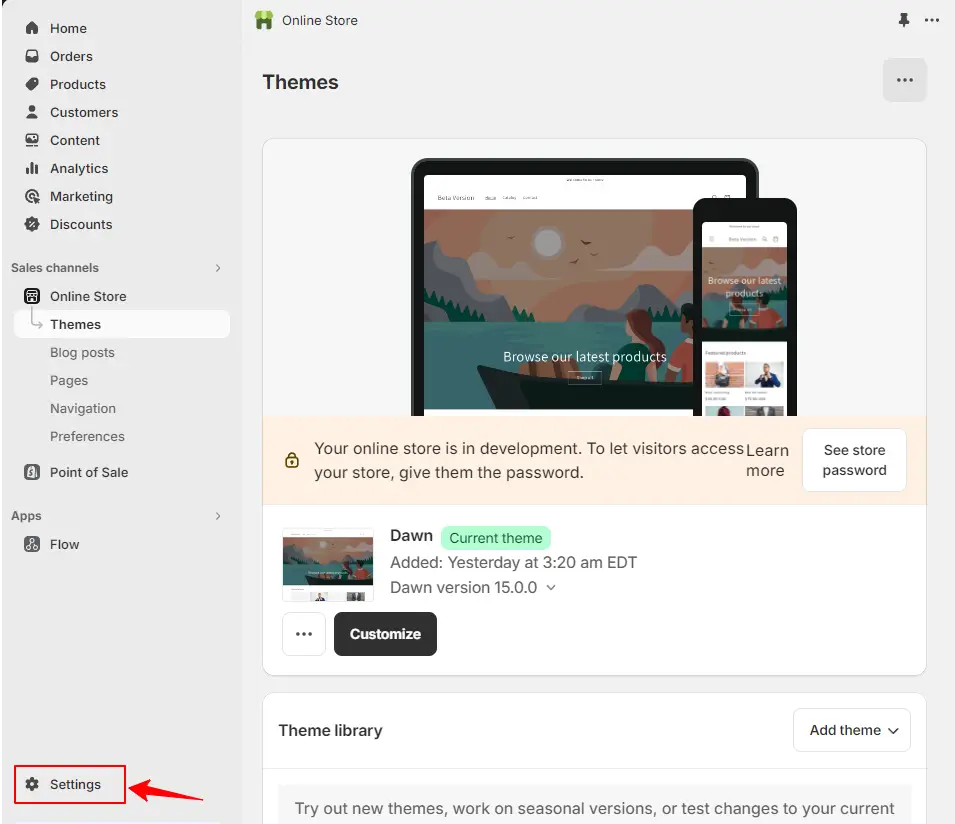
- Log in to your Shopify admin
- Go to Settings in the left corner
Step 3: Navigate to Language
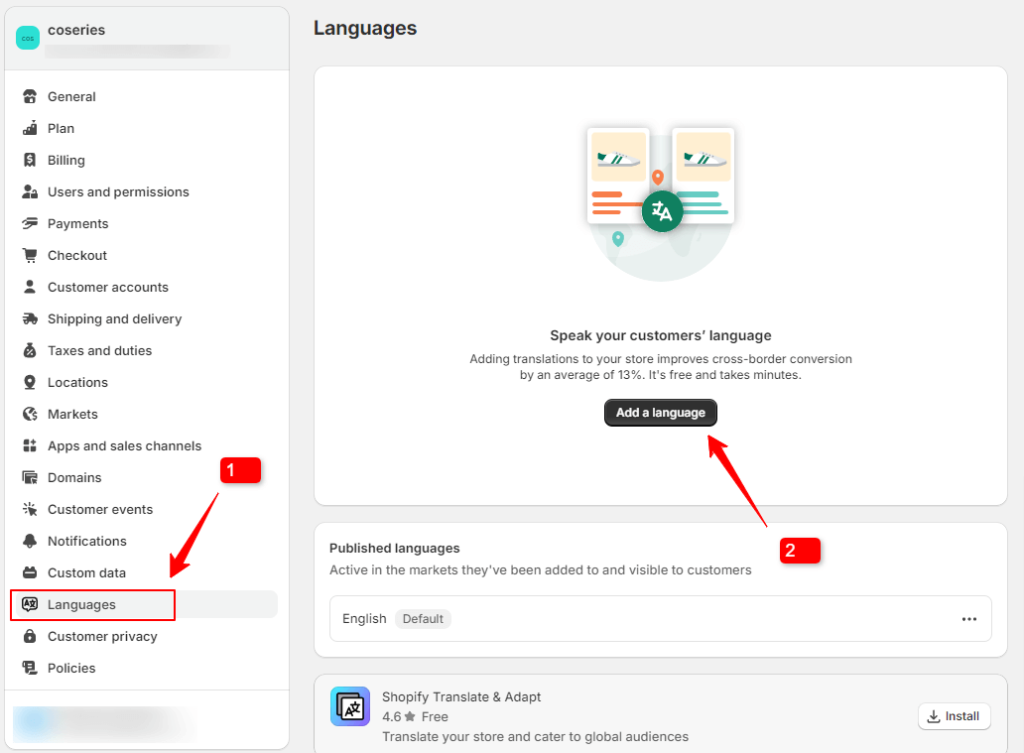
- First, click on Language
- Then click on Add a language
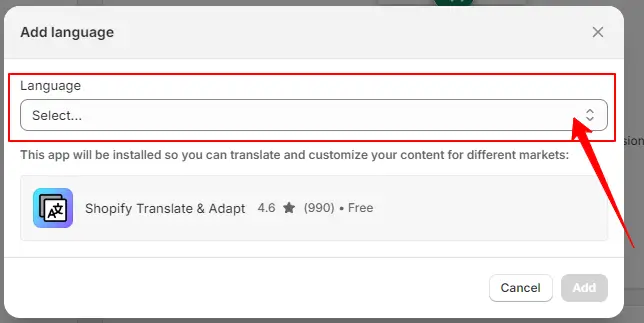
Step 4: Choose a Language
After that, you must choose a language to add to your store. This will allow you to offer your products and services in a different language, making your store accessible to a wider range of customers who speak that language.
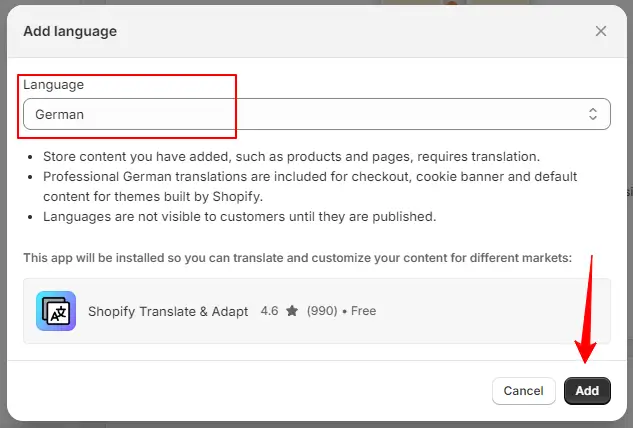
Step 5: Add a Language
After selecting the language, click on the ‘Add‘ button to apply the Shopify language change to your store.
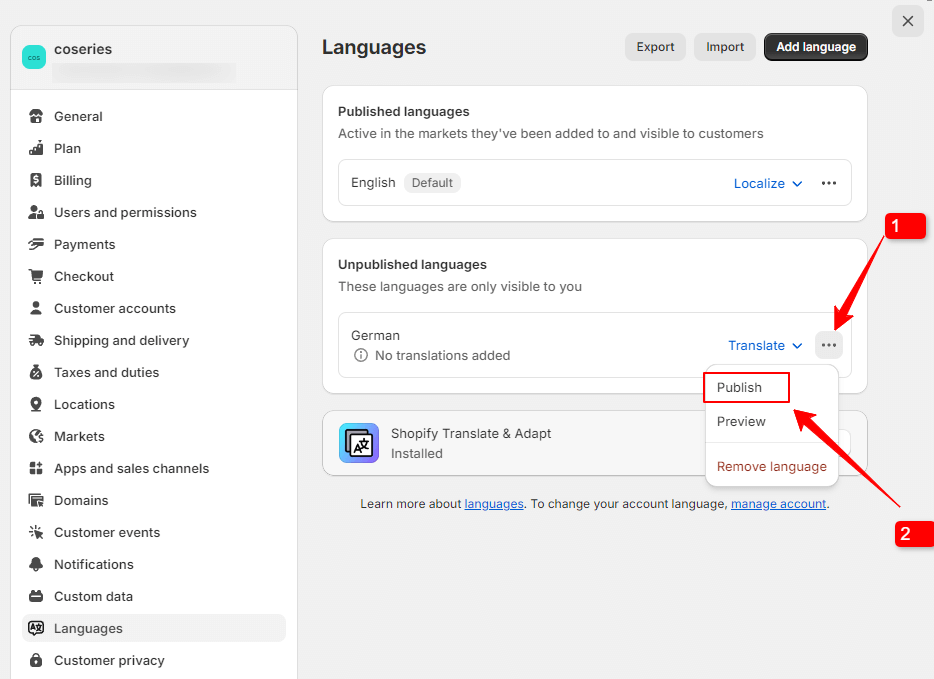
Step 6: Publish the Language
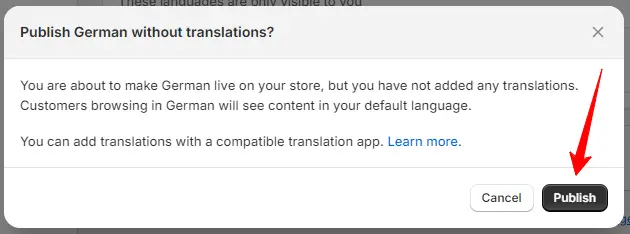
The language has now been added to the store, but it is not yet available for customers to use. To make the new language accessible to customers, we need to publish it.
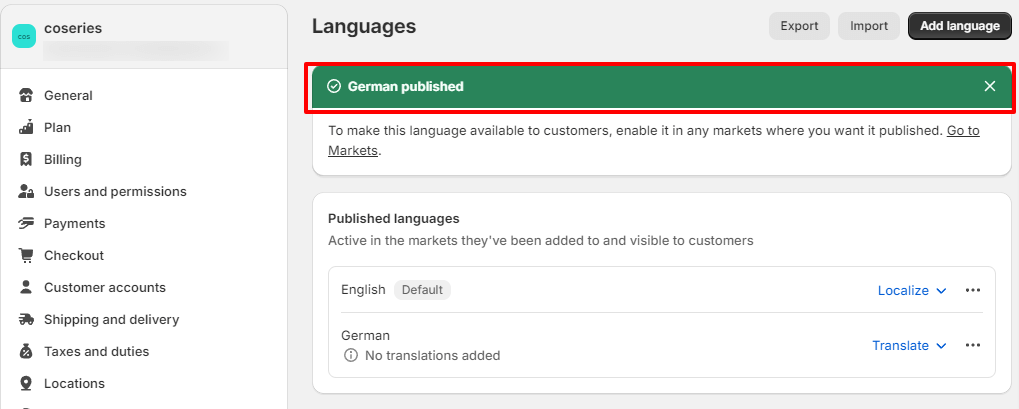
The shopify language change has been successfully published.
This involves updating the store settings to ensure that the language is active and visible on the storefront.
To activate the Language an Announcement bar, navigate to Themes > Customize > Announcement bar, and then enable the language selector option.
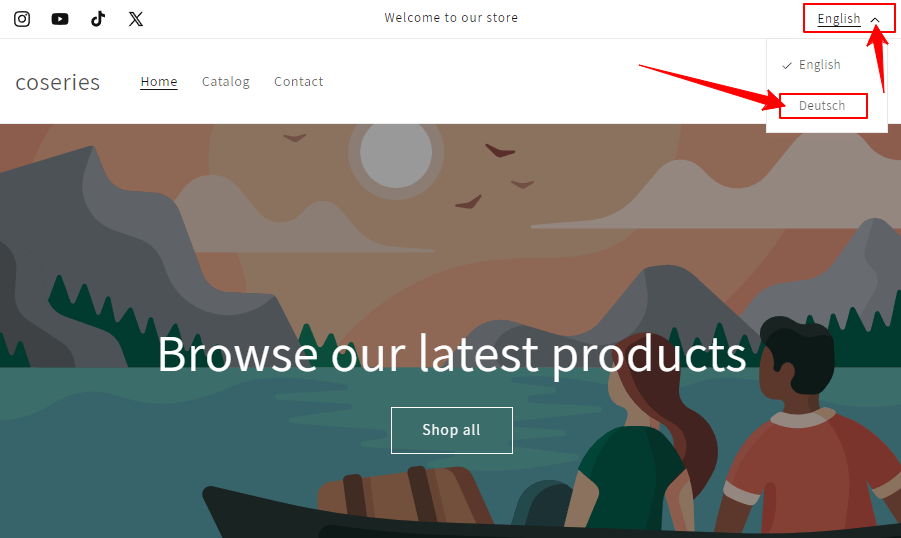
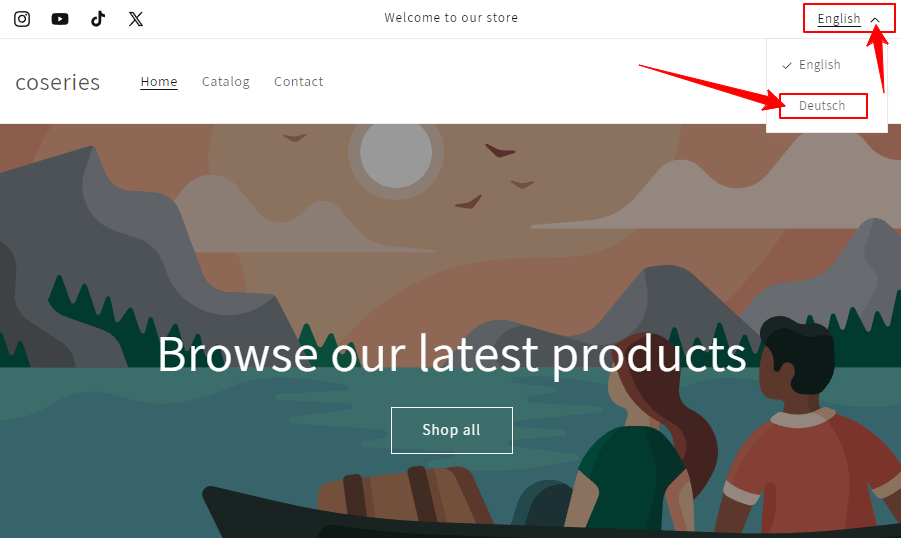
Now, the customer sees the German language displayed on the right corner of the Announcement bar.
If you want to set any language as the default language, follow these steps:
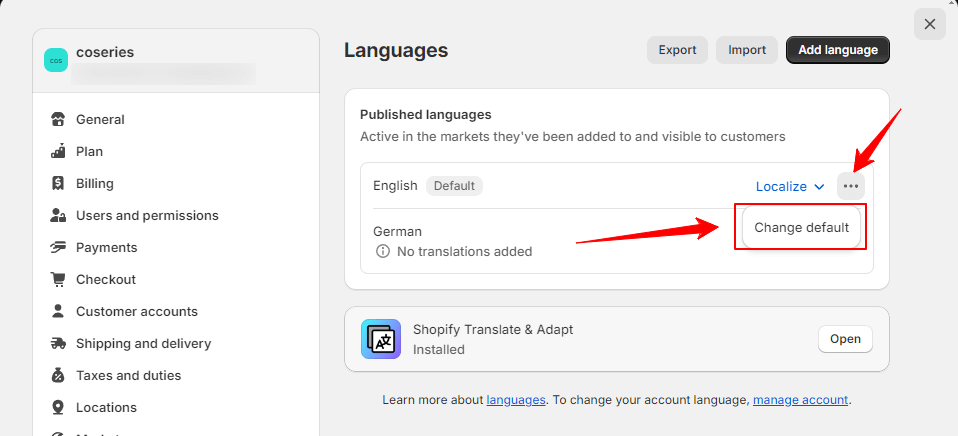
First, click on Change default
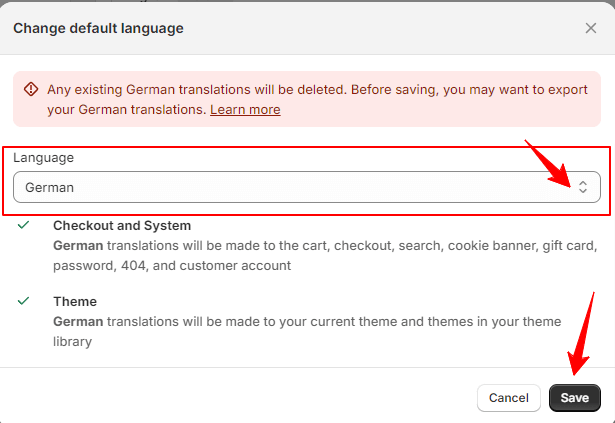
After that, you must choose a language to add to your store as a default Shopify language change And click on the save button
Shopify language change can significantly improve the shopping experience for non-native speakers and expand your reach to a global audience. By following the steps outlined in this guide, you can easily manage the languages in your store without the need for additional apps. Enhance your store’s accessibility and user satisfaction by implementing these changes today.
We hope that you find this article helpful! You can follow more Shopify article in given below
How to Enable Shopify Local Pickup
How to Deactivate and Remove the Market from Shopify Store
How to Set up Navigation Menu on Shopify
How to Change Your Primary Market on Shopify for Maximum Success


