
Arithmetic and Bitwise Operations on Image in Python using OpenCV
in Python, Image Processing on November 11, 2020by coseriesIn the last article we learnt about Color Spaces and Conversion. In this article, we are going to learn how to apply Arithmetic and Bitwise Operations on Image in Python using OpenCV library.
First, let’s go through the arithmetic operations.
Arithmetic Operations
Addition
This is the very basic and first topic of Arithmetic Operations on Image. The cv2.add() function is used to add two images or add a scalar to an image. It takes two images as arguments, or one image and a scalar value. Note that to add two images, both need to be of the same size.
You can add two images using the NumPy addition as well, i.e., result = img1 + img2. However, the results of the OpenCV function are much better.
We are going to add a football image to a football ground, as shown below.


But before adding them, we need to resize them to the same size. For that, we will use the cv2.resize() function. It takes the image that needs to be resized and the tuple containing the width and the height, i.e., (width, height). Let’s see.
import cv2

img1 = cv2.imread("ground.jpg")
img2 = cv2.imread("football.jpg")
img1 = cv2.resize(img1, (500, 400))
img2 = cv2.resize(img2, (500, 400))
cv2.imshow("Ground", img1)
cv2.imshow("Football", img2)
cv2.waitKey(0)
cv2.destroyAllWindows()
Output
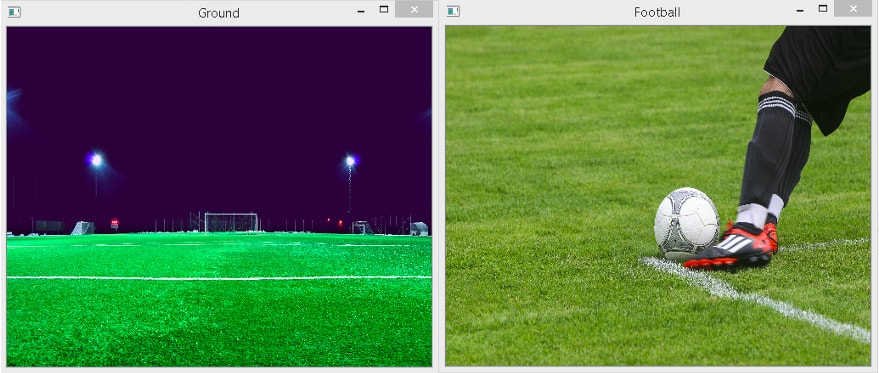
Both images have dimensions (400, 500, 3).
Now, let’s add them.
import cv2

img1 = cv2.imread("ground.jpg")
img2 = cv2.imread("football.jpg")
img1 = cv2.resize(img1, (500, 400))
img2 = cv2.resize(img2, (500, 400))
result_opencv = cv2.add(img1, img2)
result_numpy = img1 + img2
cv2.imshow("Result OpenCv", result_opencv)
cv2.imshow("Result Numpy", result_numpy)
cv2.waitKey(0)
cv2.destroyAllWindows()
Output
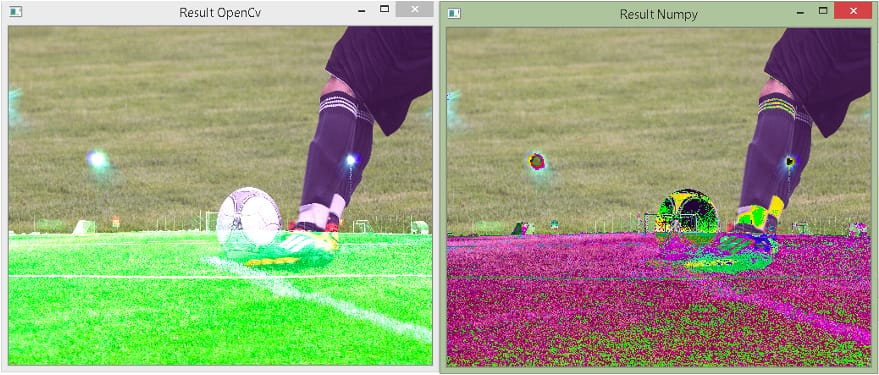
As you can see in the output, the result using the OpenCV function is a lot better than the manual addition. But the result is still not satisfactory. Most of the time, we do not want to add the exact values of both images. In other words, we want to have the effect of one image more than the other, i.e., add some transparency to images. Fortunately, OpenCV provides a function to do that. The cv2.addWeighted() function allows us to add weights to images. i.e.,
result = w1 × img1 + w2 × img2 + c
Where w1 is the weight applied to the img1, w2 is the weight applied to the img2, and c is a scalar value to increase (when c is positive) or decrease (when c is negative) brightness.
The function takes 5 arguments according to the above equation, i.e., cv2.addWeighted(img1, w1, img2, w2, c).
Let’s try to improve the above result using this function.
import cv2

img1 = cv2.imread("ground.jpg")
img2 = cv2.imread("football.jpg")
img1 = cv2.resize(img1, (500, 400))
img2 = cv2.resize(img2, (500, 400))
result= cv2.addWeighted(img1, 0.5, img2, 0.5, 0)
cv2.imshow("Result OpenCv", result)
cv2.waitKey(0)
cv2.destroyAllWindows()
Output
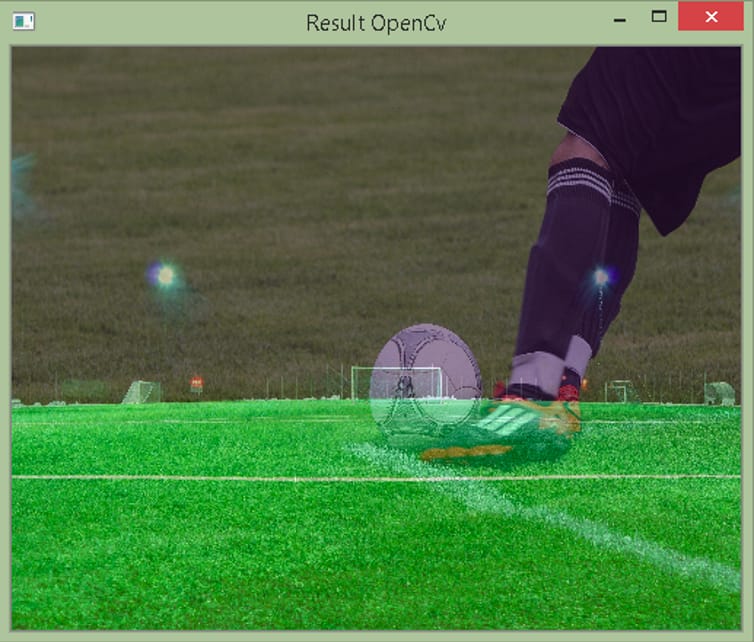
As you can see, it has improved a lot.
Subtraction
The cv2.subtract() function is used to subtract one image from another or a scalar value from an image. Like, cv2.add(), both need to be of the same size.
Image subtraction is usually used to compare two images, i.e., highlight differences between two images.
Use the cv2.subtract() method instead of the manual subtraction, i.e., img1-img2, because it provides better results.
Let’s find the difference between the following two images.


import cv2

img1 = cv2.imread("dog1.jpg")
img2 = cv2.imread("dog2.jpg")
img1 = cv2.resize(img1, (500, 400))
img2 = cv2.resize(img2, (500, 400))
result= cv2.subtract(img1, img2)
cv2.imshow("Result", result)
cv2.waitKey(0)
cv2.destroyAllWindows()
Output
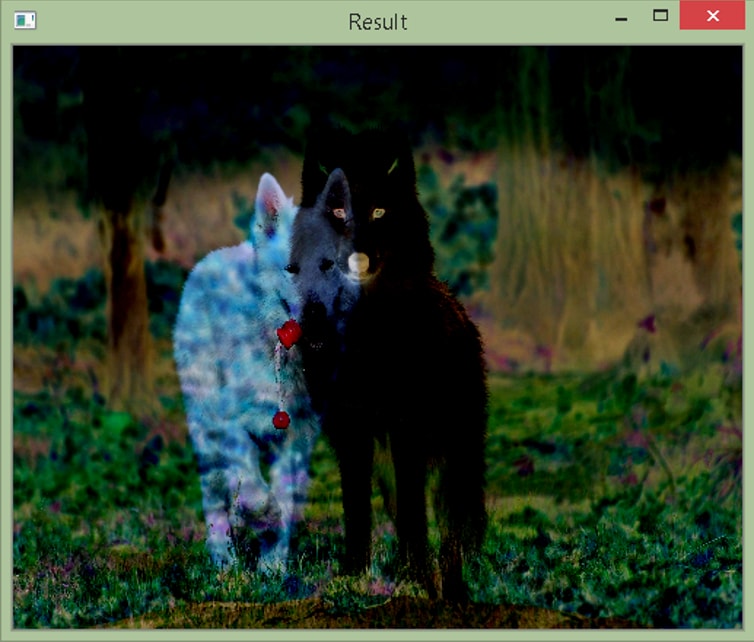
In the above example, first, we read the above two images. Then, we resize them to the same size, i.e., (400, 500, 3). After that, we subtract img2 from img1 and display the result.
We have discussed the first part of the Arithmetic and Bitwise Operations on Image. Now we will discuss Bitwise operation.
Bitwise Operations
Before performing the bitwise operations, first, let’s create two binary images. We will apply bitwise operations on them. Consider the code below.
import cv2
import numpy as np

img1 = np.zeros((400, 400, 3), dtype  = np.uint8)
img2 = np.zeros((400, 400, 3), dtype  = np.uint8)
img1 = cv2.rectangle(img1, (150, 150), (250, 250), (255,255, 255), -1)
img2 = cv2.rectangle(img2, (0, 200), (400, 400), (255,255, 255), -1)
cv2.imshow("img1", img1)
cv2.imshow("img2", img2)
cv2.waitKey(0)
cv2.destroyAllWindows()
In the above example, first, we import numpy as np. Then, we use the np.zeros() function to create two images with dimensions (400, 400, 3). All the pixels in them are black, i.e., zero. Then, we use the cv2.rectangle() method to create a white region in them. It takes the image, (x, y) coordinates of the top left and bottom right rectangle, color, and thickness. In our case, the color is white, and the thickness is -1 because we want to fill the region with the white color. The resulting images are shown below.
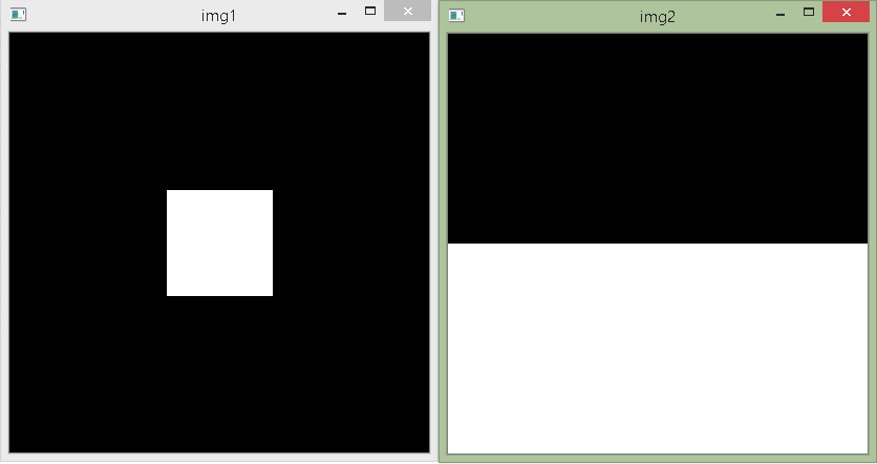
Let’s now perform the bitwise AND, OR, XOR, and NOT operations on these images. The bitwise operators work similarly as the logical operators do. Let’s see each of them.
Bitwise AND Operation
In the AND operation, the resulting pixel is white (or 1 in the truth table given below) when the corresponding pixels in both the images are white. Otherwise, the resulting pixel has the black (0 in the truth table) color. The cv2.bitwise_and() function is used to perform the AND operation. Consider the table below to see how the AND operation works. Note that for images, 0 is black, and 1 is white.
| A | B | AND |
| 0 | 0 | 0 |
| 0 | 1 | 0 |
| 1 | 0 | 0 |
| 1 | 1 | 1 |
import cv2
import numpy as np

img1 = np.zeros((400, 400, 3), dtype  = np.uint8)
img2 = np.zeros((400, 400, 3), dtype  = np.uint8)
img1 = cv2.rectangle(img1, (150, 150), (250, 250), (255,255, 255), -1)
img2 = cv2.rectangle(img2, (0, 200), (400, 400), (255,255, 255), -1)
bit_and = cv2.bitwise_and(img1,img2)
cv2.imshow("Bitwise AND", bit_and)
cv2.waitKey(0)
cv2.destroyAllWindows()
Output
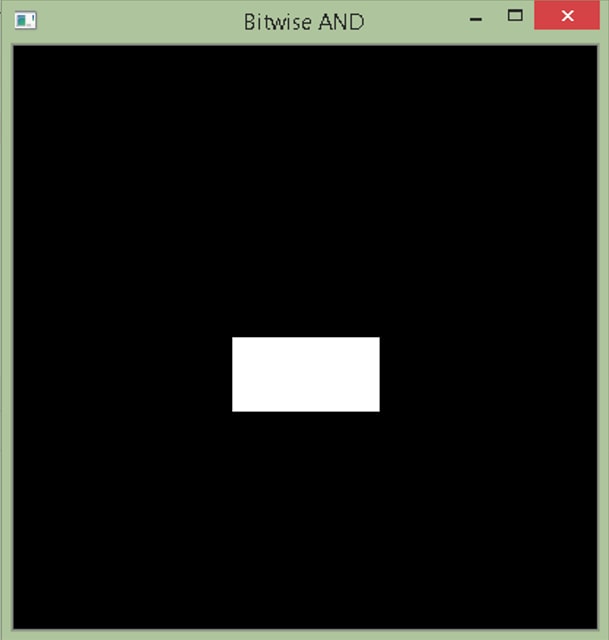
Bitwise OR Operation
In the OR operation, the resulting pixel has the black color (here, 0 in the truth table) when the corresponding pixels in both images are black. Otherwise, it is white (1 in the truth table). The cv2.bitwise_or() function is used for this.
| A | B | OR |
| 0 | 0 | 0 |
| 0 | 1 | 1 |
| 1 | 0 | 1 |
| 1 | 1 | 1 |
import cv2
import numpy as np

img1 = np.zeros((400, 400, 3), dtype  = np.uint8)
img2 = np.zeros((400, 400, 3), dtype  = np.uint8)
img1 = cv2.rectangle(img1, (150, 150), (250, 250), (255,255, 255), -1)
img2 = cv2.rectangle(img2, (0, 200), (400, 400), (255,255, 255), -1)
bit_or = cv2.bitwise_or(img1,img2)
cv2.imshow("Bitwise OR", bit_or)
cv2.waitKey(0)
cv2.destroyAllWindows()
Output

Bitwise XOR Operation
The cv2.bitwise_xor() function performs the XOR operation. It returns False when both the images have the same values, i.e., both are black, or both are white.
| A | B | XOR |
| 0 | 0 | 0 |
| 0 | 1 | 1 |
| 1 | 0 | 1 |
| 1 | 1 | 0 |
import cv2
import numpy as np

img1 = np.zeros((400, 400, 3), dtype  = np.uint8)
img2 = np.zeros((400, 400, 3), dtype  = np.uint8)
img1 = cv2.rectangle(img1, (150, 150), (250, 250), (255,255, 255), -1)
img2 = cv2.rectangle(img2, (0, 200), (400, 400), (255,255, 255), -1)
bit_xor = cv2.bitwise_xor(img1,img2)
cv2.imshow("Bitwise XOR", bit_xor)
cv2.waitKey(0)
cv2.destroyAllWindows()
Output

Bitwise NOT Operation
The NOT operation is quite straightforward. It just inverts the pixel value. If it is black (here, 0 in the truth table), the corresponding pixel in the resulting image will be white (1 in the truth table). The cv2.bitwise_not() performs the NOT operation.
| A | NOT |
| 0 | 1 |
| 1 | 0 |
import cv2
import numpy as np

img1 = np.zeros((400, 400, 3), dtype  = np.uint8)
img2 = np.zeros((400, 400, 3), dtype  = np.uint8)
img1 = cv2.rectangle(img1, (150, 150), (250, 250), (255,255, 255), -1)
img2 = cv2.rectangle(img2, (0, 200), (400, 400), (255,255, 255), -1)
cv2.imshow("img1", img1)
cv2.imshow("img2", img2)
bit_not_img1 = cv2.bitwise_not(img1)
bit_not_img2 = cv2.bitwise_not(img2)
cv2.imshow("Bitwise NOT on img1", bit_not_img1)
cv2.imshow("Bitwise NOT on img2", bit_not_img2)
cv2.waitKey(0)
cv2.destroyAllWindows()
Output
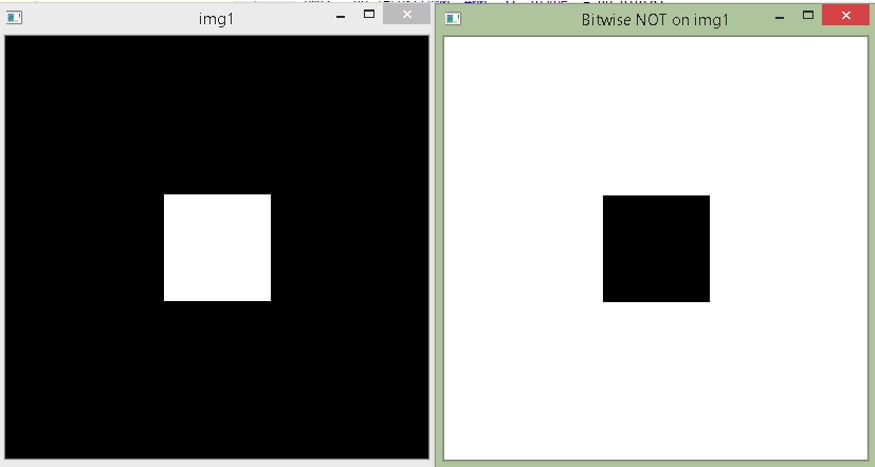

Masking
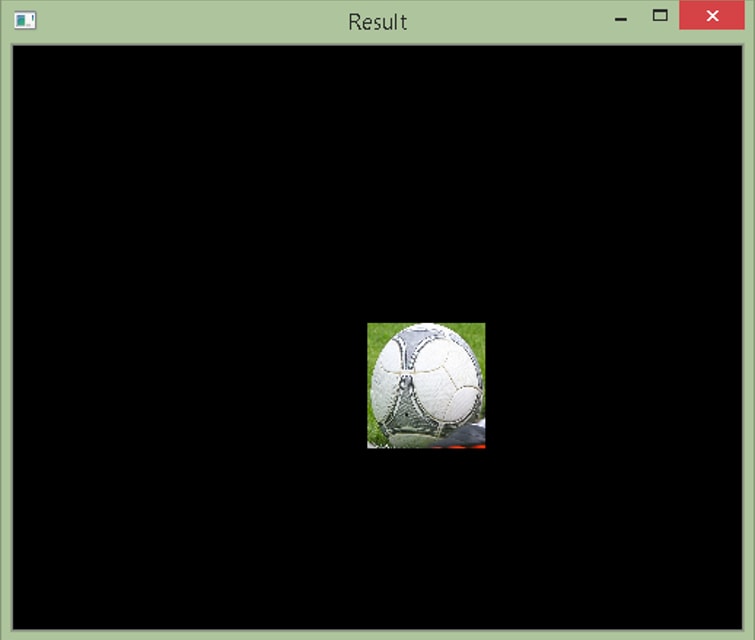
Performing bitwise operations on images has many applications. For example, we can manipulate it and extract its desired part. Moreover, the bitwise AND operation can be used in image masking. Image masking allows us to focus on a specific region in an image. It can be done using the bitwise AND operation. Let’s extract the football from the above football.jpg image.
import cv2
import numpy as np
import matplotlib.pyplot as plt
img1 = cv2.imread("football.jpg")
img1 = cv2.resize(img1, (500, 400))
mask = np.zeros(img1.shape, dtype  = img1.dtype)
mask = cv2.rectangle(mask, (243, 190), (323, 275), (255,255, 255), -1)
result = cv2.bitwise_and(img1,mask)
cv2.imshow("Result", result)
cv2.waitKey(0)
cv2.destroyAllWindows()
In the example above, we import NumPy to create a mask image using the np.zeros() function. It contains the same dimensions and the type as the img1, and all values are equal to zero. To get the desired region in the img1 (football), we need to make that region white in the mask image. For that, we use the cv2.rectangle() method. It is shown below.
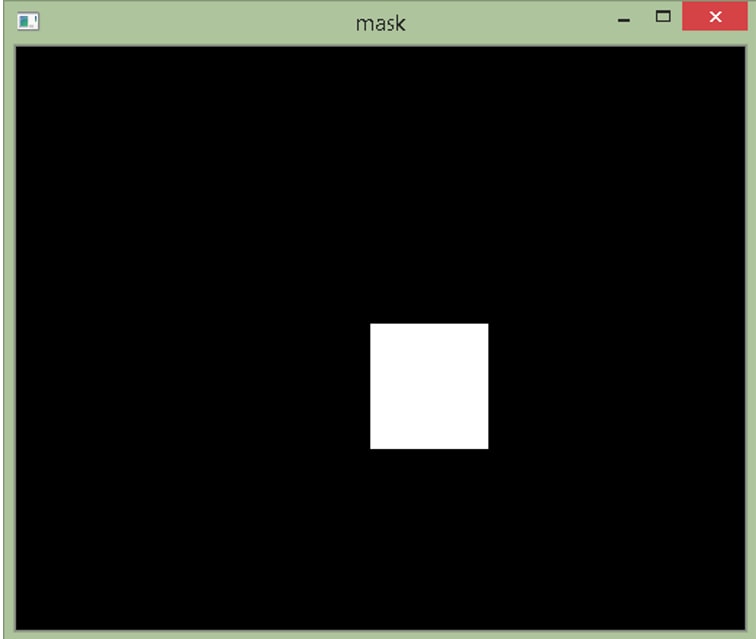
Now that we have the mask image, let’s apply the bitwise AND operation between the img1 and the mask. The cv2.bitwise_and() chooses the smaller value from the given two values when performing the AND operation in a non-binary image. Therefore, all the pixels, excluding those in the football region, will become zero in the resulting image because the corresponding values in the mask image are zero. Moreover, in the football region, cv2.bitwise_and() will take values of the img1 because the mask image contains 255 (the maximum pixel value) everywhere in that region. Therefore, values in the img1 will either be smaller or equal to 255. The final result is shown below.
That’s all about Arithmetic and Bitwise Operations on Image. Cool, right?


