
Python OpenCV: Color Spaces and Conversion
in Python, Image Processing on November 6, 2020by coseriesIn this article, we are going to learn different color spaces and how to convert from one color space to another using Python OpenCV. So, let’s get started.
Color Spaces
Color spaces are a way of representing colors in an image in a specific way. Several color spaces exist, but in this article, we are going to discuss some important ones, i.e.,
- RGB
- CMYK
- HSV
RGB
RGB color space is one of the popular color spaces. It is used in many places. For example, the monitor uses the RGB format. RGB stands for Red, Blue, and Green. It is an additive color model because we start with black (monitors/ screens are black when they are turned off). Then, we add different amounts of Red, Blue, and Green colors to get various colors, i.e., a different combination of Red, Blue, and Green result in various new colors, as shown below.
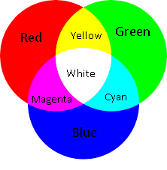
As you can see in the above figure, white gets formed when all the colors (Red, Blue, and Green) are added together in equal amounts.
However, OpenCV, by default, reads an image in the BGR (Blue, Green, and Red) format instead of the RGB. It is the same, except the order of colors is reversed. The value of each channel ranges from 0 to 255 in both the RGB and the BGR.
CMYK
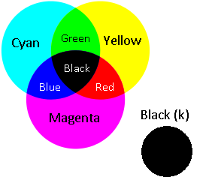
It is another color space, which is used in printers. CMYK stands for Cyan, Magenta, Yellow, and Black. It is a subtractive model because we start with white. (the page used for printing is white, which means it reflects all of the colors.) Then, we subtract that white light by adding Cyan, Magenta, and Yellow colors. In theory, black gets produced when Cyan, Magenta, and Yellow are added in equal amounts. However, in reality, when we add them, it forms a muddy brown color rather than black. Therefore, we add black color (K in the CMYK model) separately.
HSV
HSV stands for Hue, Saturation, and Value. Unlike RGB and CMYK, this color space is closer to the human perception of color. It is an alternative representation of the RGB colors, i.e., a cylindrical representation. Hue represents the dominant color, and its value varies from 0 to 179. Saturation represents relative purity. It ranges from 0 to 255, where 255 represents no impurity (no white light added). Value or Brightness represents the intensity of the color. Its value varies from 0 to 255, where 0 value means no brightness, i.e., black. Note that these ranges are according to OpenCV values.
Conversion
So, now we know about the different color spaces. Let’s see how we can convert our image from one color space to another using Python OpenCV.
cv2.cvtColor()
The cv2.cvtColor() function is a function of Python OpenCV used to change the color space. It takes two arguments. The first argument is the image, and the second argument is the conversion flag. There are more than 150 color space conversion methods available in OpenCV. We will look into some of them here.
We will use the following flower image as our reference image.
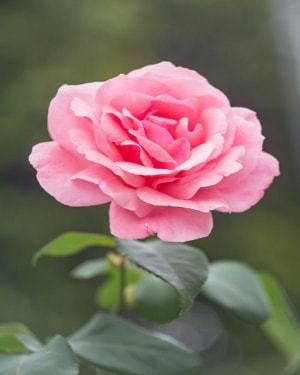
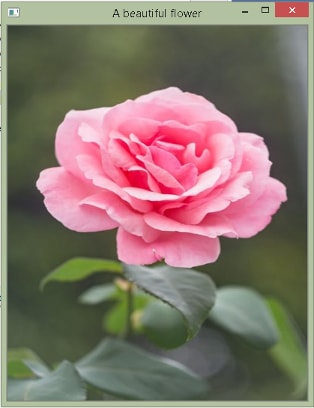
First, let’s load our image in the color format. From the last article, we know that the image gets loaded in the BGR color space when the flag passed is cv2.IMREAD_COLOR or 1.
import cv2

img = cv2.imread("flower.jpg", 1)
cv2.imshow("A beautiful flower", img)
cv2.waitKey(0)
cv2.destroyAllWindows()
Output
BGR -> Grayscale Conversion
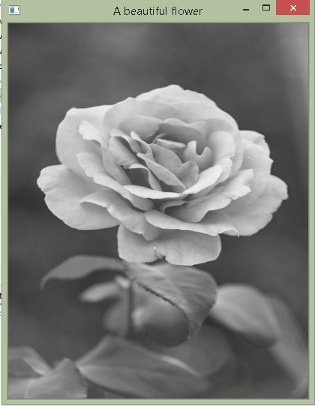
Now, let’s convert that image from BGR to Grayscale. To do that, we will use the flag cv2.COLOR_BGR2GRAY.
import cv2

img = cv2.imread("flower.jpg", 1)
img_gray = cv2.cvtColor(img, cv2.COLOR_BGR2GRAY)
cv2.imshow("A beautiful flower", img_gray)
cv2.waitKey(0)
cv2.destroyAllWindows()
Output
Grayscale -> BGR Conversion
One thing to note here is that once you are in the grayscale format, you cannot go back to the color format, i.e., the color information is now lost. Let’s try it anyhow and see what we get.
import cv2

img = cv2.imread("flower.jpg", 1)
img_gray = cv2.cvtColor(img, cv2.COLOR_BGR2GRAY)
img_color = cv2.cvtColor(img_gray, cv2.COLOR_GRAY2BGR)
cv2.imshow("A beautiful flower in color format", img_color)
cv2.imshow("A beautiful flower in grayscale", img_gray)
cv2.waitKey(0)
cv2.destroyAllWindows()
Output
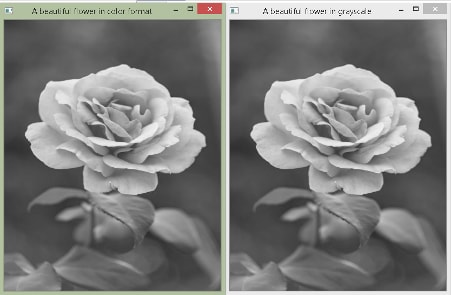
As you can see in the output above, we were not able to get the original image back. However, img_color still contains three channels.
print(img_color.shape)
Output
(500, 400, 3)Moreover, all three channels are the same and equal to img_gray. Let’s see.
import cv2

img = cv2.imread("flower.jpg", 1)
img_gray = cv2.cvtColor(img, cv2.COLOR_BGR2GRAY)
img_color = cv2.cvtColor(img_gray, cv2.COLOR_GRAY2BGR)
blue, green, red = cv2.split(img_color)
print("img_gray and blue")
print(img_gray == blue)
print("img_gray and green")
print(img_gray == green)
print("img_gray and red")
print(img_gray == red)
Output
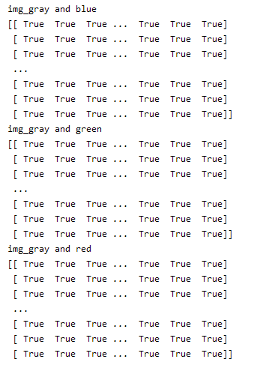
In the above code, we use the cv2.split() function to get three channels separately. Then, we compare each one of them with img_gray. As you can see in the output, blue = green = red = img_gray.
BGR -> HSV Conversion
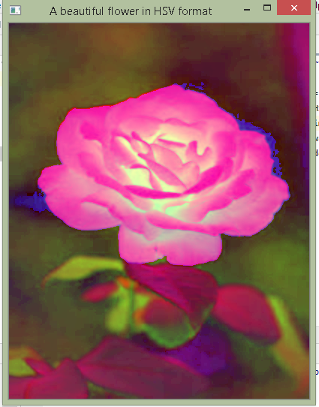
Now, let’s convert the image from BGR to HSV using the cv2.COLOR_BGR2HSV flag.
import cv2

img = cv2.imread("flower.jpg", 1)
img_HSV = cv2.cvtColor(img, cv2.COLOR_BGR2HSV)
cv2.imshow("A beautiful flower in HSV format", img_HSV)
cv2.waitKey(0)
cv2.destroyAllWindows()
Output
HSV -> BGR Conversion
Let’s go back to the original color space using the cv2.HSV2BGR flag.
import cv2

img = cv2.imread("flower.jpg", 1)
img_HSV = cv2.cvtColor(img, cv2.COLOR_BGR2HSV)
img_BGR = cv2.cvtColor(img_HSV, cv2.COLOR_HSV2BGR)
cv2.imshow("A beautiful flower in HSV format", img_HSV)
cv2.imshow("A beautiful flower in BGR grayscale", img_BGR)
cv2.waitKey(0)
cv2.destroyAllWindows()
Output
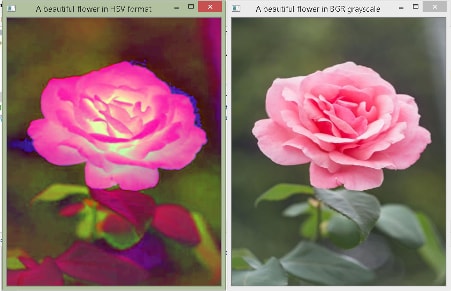
As you can observe, the conversion flag follows some naming convention, i.e., cv2.COLOR_(color_space)2(color_space). For example, cv2.COLOR_BGR2HSV.
BGR -> RBG Conversion and RGB -> BGR Conversion
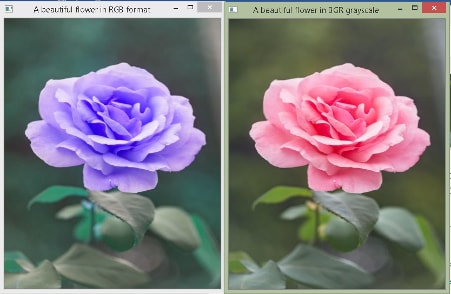
The conversions between BGR and RGB are given below. Moreover, the flags used are cv2.COLOR_BGR2RGB and cv2.COLOR_RGB2BGR.
import cv2

img = cv2.imread("flower.jpg", 1)
img_RGB = cv2.cvtColor(img, cv2.COLOR_BGR2RGB)
img_BGR = cv2.cvtColor(img_RGB, cv2.COLOR_RGB2BGR)
cv2.imshow("A beautiful flower in RGB format", img_RGB)
cv2.imshow("A beautiful flower in BGR grayscale", img_BGR)
cv2.waitKey(0)
cv2.destroyAllWindows()
Output
Get all the Conversion Flags
There are a lot more conversion flags than the ones specified here. The following code lists all of them.
import cv2

flags = []
for i in dir(cv2):
    if i.startswith("COLOR_"):
        flags.append(i)

print(f"Total flags: {len(flags)}")
print(flags)
Output
Total flags: 274
['COLOR_BAYER_BG2BGR', 'COLOR_BAYER_BG2BGRA', 'COLOR_BAYER_BG2BGR_EA', 'COLOR_BAYER_BG2BGR_VNG', 'COLOR_BAYER_BG2GRAY', 'COLOR_BAYER_BG2RGB', 'COLOR_BAYER_BG2RGBA', 'COLOR_BAYER_BG2R, …… ]
The above output displays some of the flags since I cannot include all of them here. Run the above code in your machine to get all of them. That’s all for today on Python OpenCV. In our next article, we will discuss different types of operations.

