How to Add Products to Multiple Locations in Shopify
in Shopify, Shopify Customization on September 25, 2024by Mosfequr RahmanAdd Products to Multiple Locations in Shopify: Shopify’s Locations feature helps online store owners manage inventory across different places, like warehouses, retail stores, or pop-up shops. It allows you to track your products in each location, making sure they’re available where your customers need them. This reduces the risk of overselling and helps provide accurate shipping estimates. Whether your business is expanding or already operating in multiple areas, Shopify Locations gives you better control over stock levels and streamlines order fulfillment. In this guide, we’ll show you how to set up and manage Shopify Locations to improve your inventory management and customer experience.
Before adding a product to multiple locations, please ensure that your store has multiple locations. If not, you will need to create a location. We will guide you through the process of creating a location in your Shopify store.
Step-by-Step Guide: How to add a location in Shopify
You can easily manage your inventory across different places with Shopify’s Locations feature. You can add new locations as your business grows, deactivate locations you’re not using, and reactivate them if needed. If a location is no longer necessary, you can delete it entirely. In the Settings menu under Locations, you can see all your locations, filter and sort them to find what you need, and quickly search for specific locations. This makes it easy to keep track of where your products are stored and manage your business smoothly.
Step 1: Log in to Your Shopify Admin
First, log in to your Shopify admin dashboard using your credentials.
Step 2: Access Settings
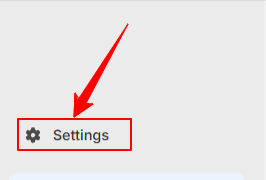
- Log in to your Shopify admin
- Go to Settings in the left corner
Step 3: Add Location
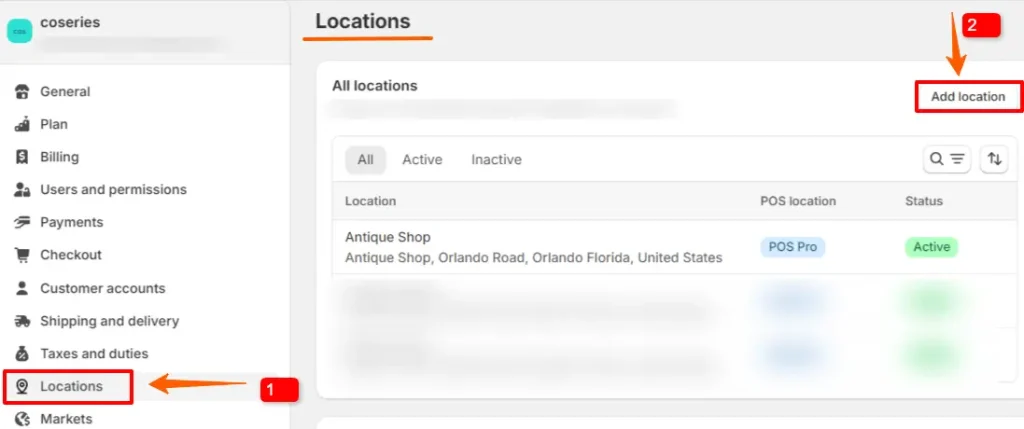
- First, click on Locations
- Then click on Add location

To add a new location in Shopify, simply click the Add button.
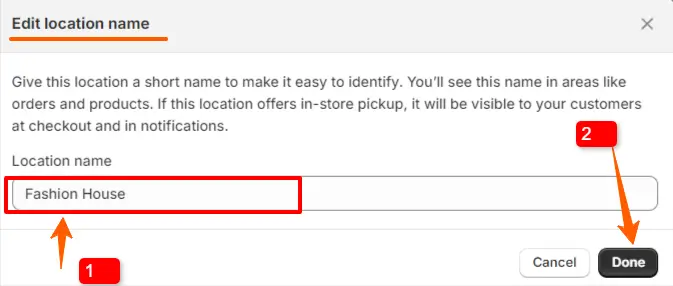
This will open a form where you can enter the name of the new location. The location name should be clear and specific, making it easy to identify within your store’s settings. This is especially helpful if you have multiple locations, such as warehouses, retail stores, or pop-up shops.

To add a new location Address in Shopify, simply click the Add button.
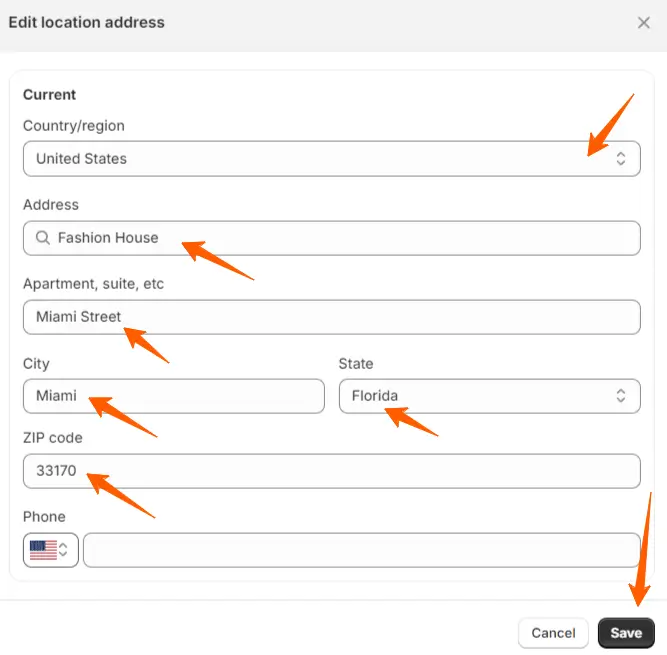
Once you’ve entered the location name, you can proceed to set up other details, like the address and contact information, to ensure everything is correctly organized and ready for inventory management.
Step-by-Step Guide: Add Products to Multiple Locations
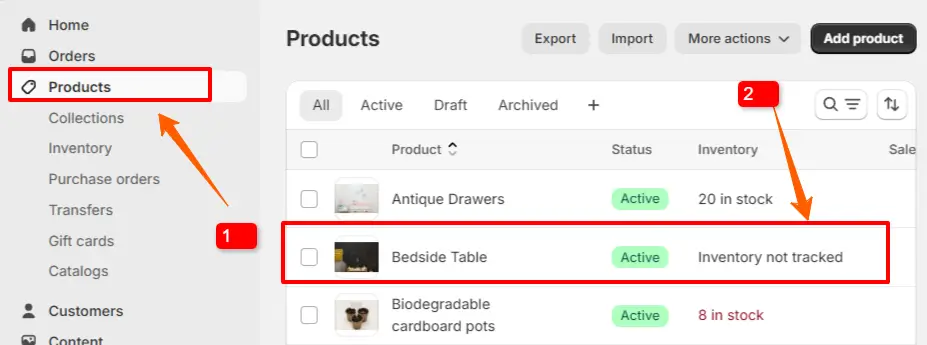
Step 1: Select the product
In your Shopify Admin dashboard, go to Products and select the product you want to add Multiple Location.
- First, click on Products
- Then click on a product for which you want to edit the product variant.
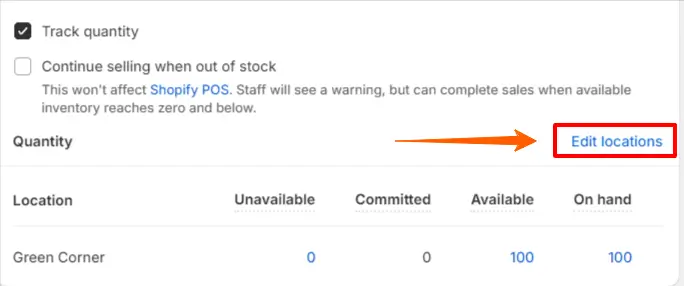
Step 2: Edit Location
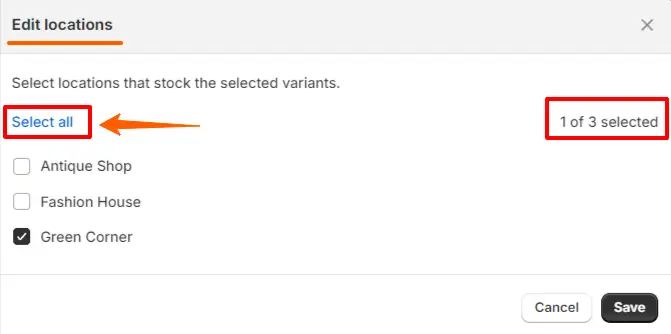
Now that you’ve added a new location, you can assign it to products in your Shopify store. Simply go to the list of locations.

Step 3: Add Multiple Location
After that, you can select all locations to add the store location or choose specific ones if you want to add this product to multiple locations
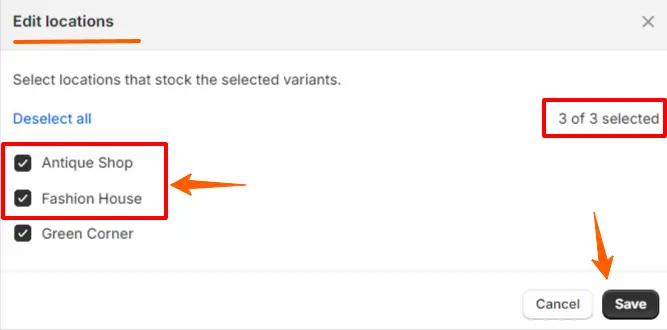
Afterward, click the Save button to apply your changes.
In conclusion, Shopify’s Locations feature is an essential tool for any online store looking to manage inventory across multiple locations efficiently. By providing better control over stock levels and streamlining the fulfillment process, this feature not only enhances your operational efficiency but also improves the customer experience. As your business grows and expands into new regions, Shopify Locations will ensure that your inventory management remains seamless, allowing you to focus on what matters most serving your customers and growing your business.
To understand the process of adding products, check the article linked below.
How to Add a Product to Your Shopify Store
We hope that you find this article helpful! You can follow more Shopify articles given below
How to Add or Remove Shopify Product Sale Badge[No App Required]
How to Add Product Variants in Shopify


