How to Set up Navigation Menu on Shopify
in Shopify, Shopify Customization on September 27, 2024by Mosfequr RahmanHow to Set up Navigation Menu on Shopify: The navigation menu plays a crucial role in your Shopify store’s user experience, as it is the primary way visitors access different pages on your site.With Shopify, you can easily manage and customize your navigation menu through the admin panel. You can create multiple menus, reorder menu items, add dropdown sub-menus, and personalize the design to match your store’s branding
Table of Contents
Set up Navigation Menu on Shopify Step-by-Step Guide
Step 1: Log in to Your Shopify Admin
Go to Shopify and log in with your credentials.
Step 2: Create a New Menu in Shopify
Shopify creates two menus by default, which are the Main Menu and the Footer Menu.Creating a new menu in Shopify is very simple we will guide you on how you can do that.
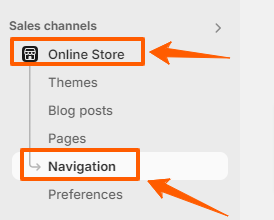

- Go to the Online Store in the left-hand sidebar menu
- In the Online Store section, click on Navigation
- click on the Add menu on the top right of the Menus box
You will now be directed to a new screen, similar to the one shown below.
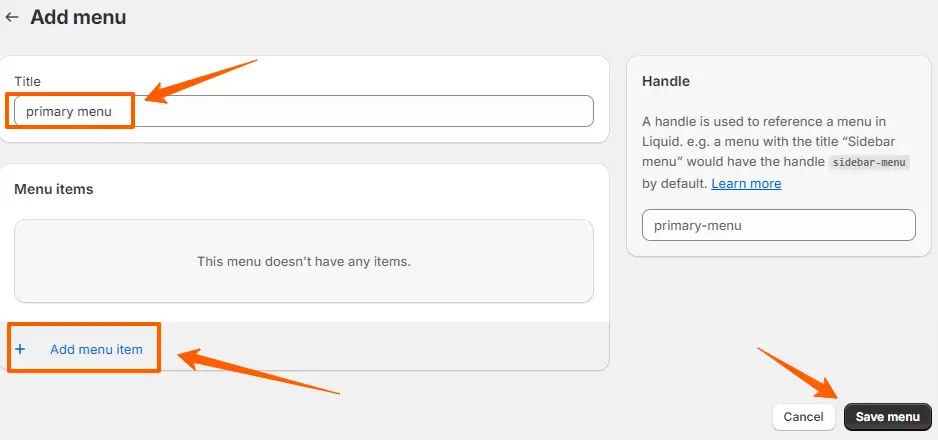
Provide a name for your Menu that reflects its purpose or content, such as “Main Menu” or “Footer Links.” After naming the menu, proceed to add Menu items by specifying the page, collection, and Product. After changing Click the Save menu button.
Step 3: Add a menu item
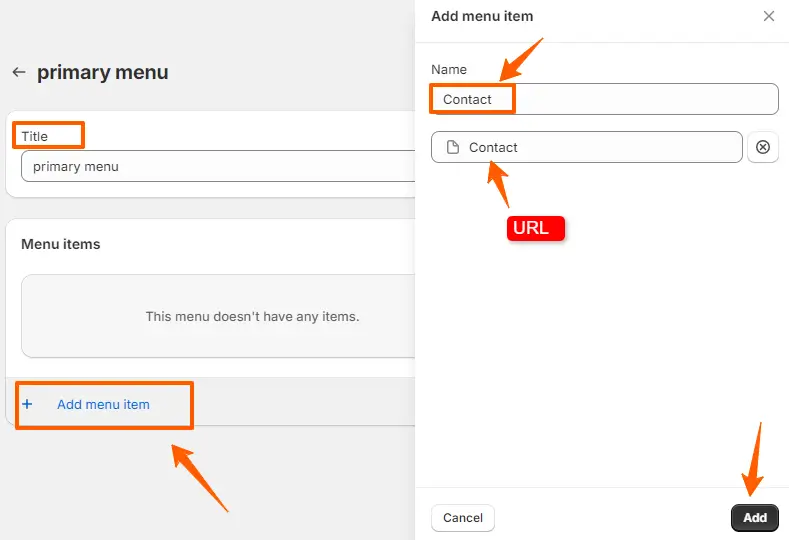
Before finalizing and saving the menu, you have the option to create one or more individual menu items. Once you have added all the desired items, you can proceed to save the entire menu, ensuring that all changes are applied.
- Add a menu item
- Enter the ‘Name‘
- Provide the ‘URL‘
- Click ‘Add‘
Step 4: Navigation menu list
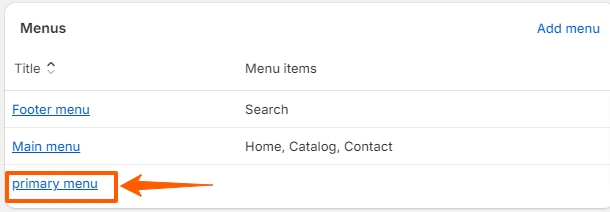
Once you have set the menu up, click save and this menu will then appear in the Menus box.
Now, navigate to the list of available menus under the Navigation settings and select the specific menu where you’d like to add additional menu items. This will allow you to manage and organize the menu by adding new links or categories as needed.

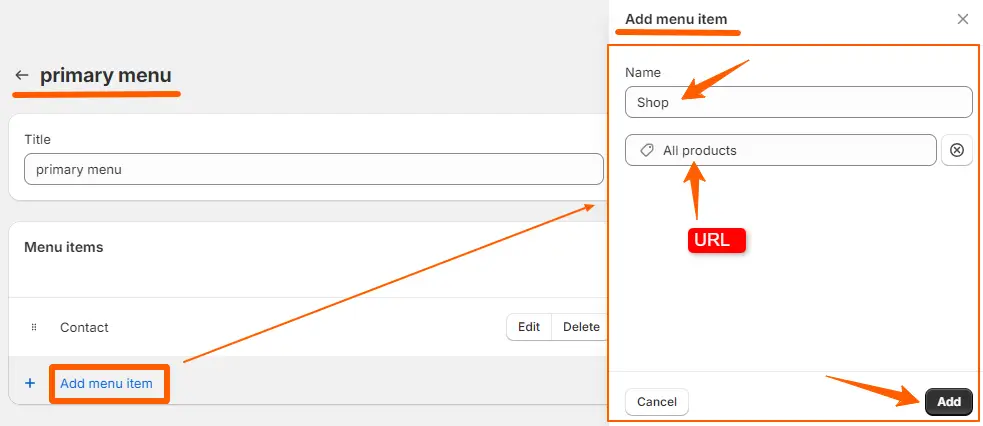
- To start adding items to your Shopify navigation menu, click the Add menu item button. This will bring up a form for entering the details.
- In the Name field, type in the name of the menu item. This is the text that will appear in your navigation menu.
- In the Link field, directly enter a URL or select a specific page, collection, blog, or other content from the drop-down list to link it to the menu item.
- Click ‘Add‘
Deleting a Menu in Shopify
You already Set up the Navigation Menu. If you’ve accidentally created too many menus or an unnecessary one, you may want to remove it. However, keep in mind that the default Main and Footer menus cannot be deleted.
Deleting a new menu in Shopify is very simple we will guide you on how you can do that.
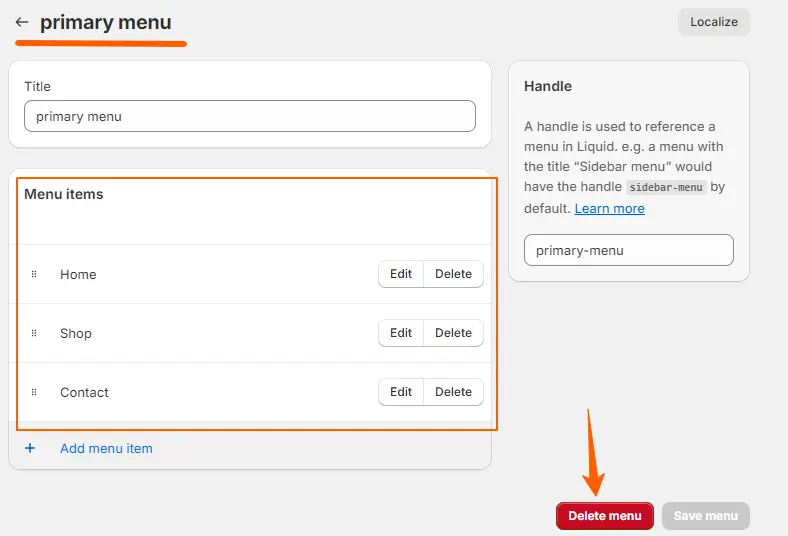
Select the menu from your Navigation menu list to delete a menu you’ve created. At the bottom of the page, you’ll see a red ‘Delete menu‘ button click on it to proceed.

A confirmation pop-up will now appear, asking if you’re sure you want to proceed. To confirm, click the red ‘Delete‘ button, and the menu will be removed from your Shopify store.
In conclusion, optimizing your Shopify store’s navigation menu enhances user experience, making it easier for visitors to find what they need. By leveraging Shopify’s flexible customization options, you can create a seamless browsing experience that aligns with your brand and improves overall site functionality.
We hope that you find this article helpful! You can follow more Shopify article given below
How to Customize an Announcement Bar on Shopify Store for Free
Shopify Language Change: A Step-by-Step Guide [No App Required]
How to Enable Shopify Local Pickup [No App Required]
How to Change Your Primary Market on Shopify for Maximum Success


