Flutter Scroll Column is an essential technique for managing layouts in Flutter, especially when building responsive and user-friendly interfaces. A common challenge arises when you need to display a list of widgets that might exceed the height of the screen. The solution? Implementing a scrollable column in Flutter. This guide will walk you through the process of creating a Flutter Scroll Column, ensuring your app remains responsive and easy to navigate, even when dealing with extensive content.
Table of Contents
Flutter Scroll Column
Understanding the Flutter Scroll Column
A Flutter Scroll Column allows you to create a vertical layout that can scroll when the content exceeds the available screen space. This is particularly useful for forms, lists, or any scenario where the content dynamically expands beyond the screen’s height.
The key widget that makes a column scrollable in Flutter is the SingleChildScrollView. This widget enables the scrolling of a single child widget, which, in our case, is a Column.
Why Use a Flutter Scroll Column?
- Dynamic Content: When the content inside a column grows dynamically, a Flutter Scroll Column ensures that all elements remain accessible without overlapping or being cut off.
- User Experience: A scrollable column enhances the user experience by allowing users to navigate through long lists or forms easily.
- Responsiveness: In different screen sizes, a Flutter Scroll Column adjusts to ensure that all content remains visible and interactable.
Step-by-Step Guide to Implementing a Flutter Scroll Column
Let’s dive into the implementation process with a step-by-step guide. We’ll cover basic usage and some advanced techniques to optimize your Flutter Scroll Column.
1. Create a Scrollable Column Using SingleChildScrollView
The most straightforward way to make a Column scrollable is by wrapping it inside a SingleChildScrollView widget. Here’s how you can do it:
void main() {
 runApp(MyApp());
}


class MyApp extends StatelessWidget {
 @override
 Widget build(BuildContext context) {
   return MaterialApp(
     home: Scaffold(
       appBar: AppBar(
         title: Text('Scrollable Column Example'),
       ),
       body: SingleChildScrollView(
         child: Column(
           children: List.generate(50, (index) {
             return Container(
               padding: EdgeInsets.all(16),
               margin: EdgeInsets.symmetric(vertical: 8, horizontal: 16),
               color: Colors.blueAccent,
               child: Text(
                 'Item $index',
                 style: TextStyle(fontSize: 18, color: Colors.white),
               ),
             );
           }),
         ),
       ),
     ),
   );
 }
}
2. Adding Headers or Footers to a Flutter Scroll Column
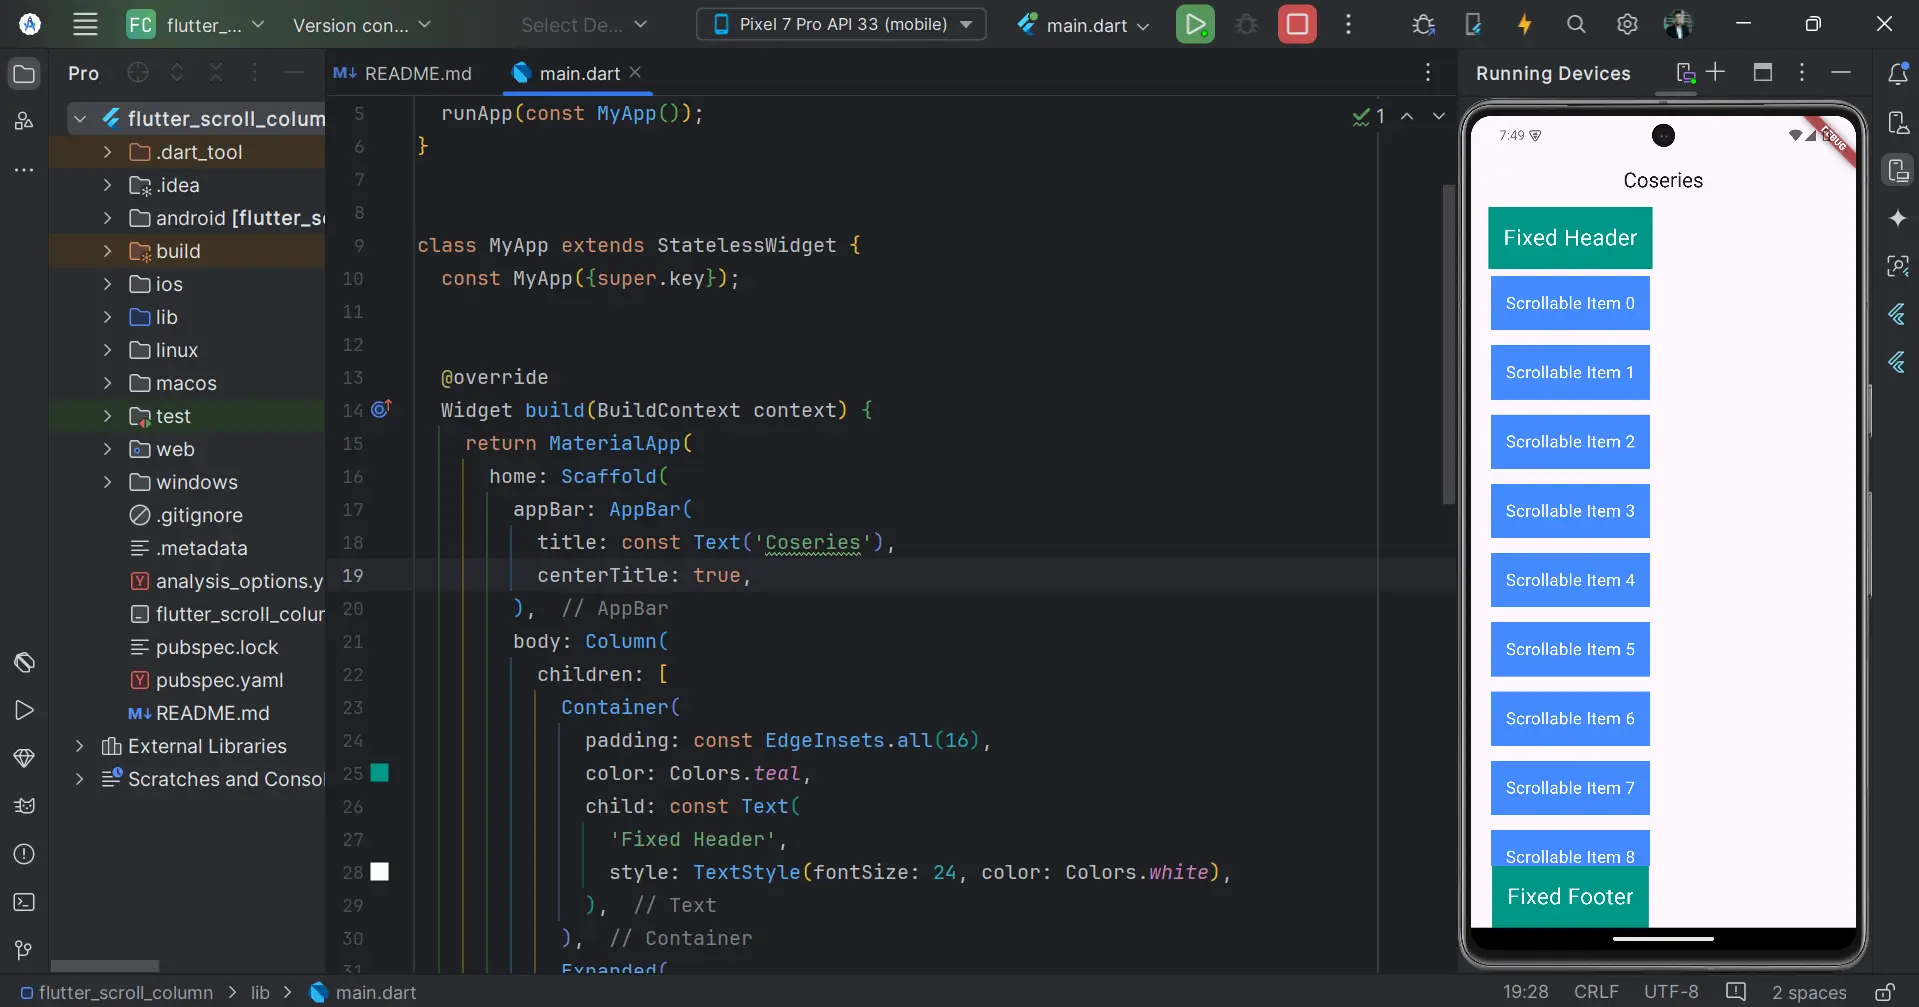
In some cases, you might want to add a static header or footer to your Flutter Scroll Column. This can be done by placing your scrollable content inside a Column and using Expanded to ensure the scrollable content takes up the remaining space.
import 'package:flutter/material.dart';


void main() {
 runApp(const MyApp());
}


class MyApp extends StatelessWidget {
 const MyApp({super.key});


 @override
 Widget build(BuildContext context) {
   return MaterialApp(
     home: Scaffold(
       appBar: AppBar(
         title: const Text('Scrollable Column with Fixed Header'),
       ),
       body: Column(
         children: [
           Container(
             padding: const EdgeInsets.all(16),
             color: Colors.teal,
             child: const Text(
               'Fixed Header',
               style: TextStyle(fontSize: 24, color: Colors.white),
             ),
           ),
           Expanded(
             child: SingleChildScrollView(
               child: Column(
                 children: List.generate(50, (index) {
                   return Container(
                     padding: const EdgeInsets.all(16),
                     margin: const EdgeInsets.symmetric(
                         vertical: 8, horizontal: 16),
                     color: Colors.blueAccent,
                     child: Text(
                       'Scrollable Item $index',
                       style:
                           const TextStyle(fontSize: 18, color: Colors.white),
                     ),
                   );
                 }),
               ),
             ),
           ),
           Container(
             padding: const EdgeInsets.all(16),
             color: Colors.teal,
             child: const Text(
               'Fixed Footer',
               style: TextStyle(fontSize: 24, color: Colors.white),
             ),
           ),
         ],
       ),
     ),
   );
 }
}
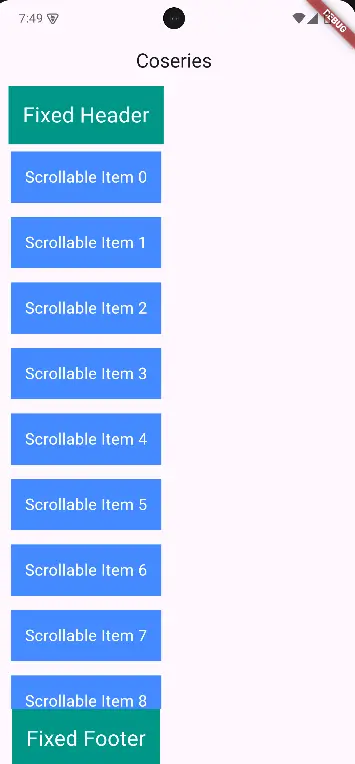
In this example, the header and footer are static, while the middle section (which is the Flutter Scroll Column) scrolls independently.
Output

3. Implementing a Scrollable Column with ListView
While the above approach works well for small to medium-sized lists, it can become inefficient when dealing with large data sets. This is because a Flutter Scroll Column built this way will render all items, even those off-screen, which can impact performance.
To handle larger lists more efficiently, consider using ListView, which only renders items that are visible on the screen:
class MyApp extends StatelessWidget {
 @override
 Widget build(BuildContext context) {
   return MaterialApp(
     home: Scaffold(
       appBar: AppBar(
         title: Text('Scrollable Column with ListView'),
       ),
       body: ListView.builder(
         itemCount: 50,
         itemBuilder: (context, index) {
           return Container(
             padding: EdgeInsets.all(16),
             margin: EdgeInsets.symmetric(vertical: 8,  horizontal: 16),
             color: Colors.blueAccent,
             child: Text(
               'Item $index',
               style: TextStyle(fontSize: 18, color: Colors.white),
             ),
           );
         },
       ),
     ),
   );
 }
}
Here, ListView.builder is used instead of a Column inside a SingleChildScrollView. This approach optimizes performance by creating items as they scroll into view, making it suitable for large lists.
Handling Edge Cases in a Flutter Scroll Column
Sometimes, your Scroll Column may encounter issues with overflow or layout constraints. Here are some tips to handle these edge cases:
- Ensure the Scroll Direction is Vertical: The default scroll direction for SingleChildScrollView is vertical, but it’s always good to specify it explicitly using the scrollDirection property.
- Avoid Nested Scroll Views: Nesting scrollable widgets can lead to unexpected behavior. If you need to nest them, consider using NestedScrollView or ensuring that only one widget handles scrolling.
- Use Flexible and Expanded Wisely: In a Flutter Scroll Column, use Flexible or Expanded widgets to manage how much space each child should take, especially when combining static and scrollable content.
Final Output
Conclusion
Implementing a Flutter Scroll Column is a fundamental skill in Flutter development, especially for building responsive and user-friendly interfaces. By wrapping your Column widget in a SingleChildScrollView, you can ensure that your content remains accessible and easy to navigate, regardless of its length.
Remember, while the basic implementation works well for smaller lists, optimizing for larger data sets with ListView.builder can significantly enhance performance. Additionally, combining static headers or footers with scrollable content gives you the flexibility to create more complex layouts.
Whether you’re building a simple list or a more intricate interface, mastering the Flutter Scroll Column will enable you to create more dynamic and responsive applications.
Additional Resources
Links
You can read also: Boost App Performance With Cached Network Image


