Flutter Move BottomSheet with Keyboard: Seamless Integration with TextField
in Flutter on December 3, 2024by Kawser MiahFlutter Move BottomSheet with Keyboard is a crucial feature for enhancing the user experience in modern Flutter applications. When a BottomSheet contains a TextField, it’s essential to ensure it moves seamlessly with the keyboard to avoid overlaps and disruptions.
In this article, you’ll learn how to implement Flutter Move BottomSheet with Keyboard effortlessly. By following step-by-step guidance, you can deliver a polished UI that dynamically adjusts the BottomSheet as the keyboard appears, ensuring a smooth and intuitive user experience.
Table of Contents
Flutter Move BottomSheet with Keyboard
Why Move the BottomSheet Along with the Keyboard?
A BottomSheet is a versatile UI component. When it includes a TextField, users expect smooth keyboard behavior. By implementing Flutter Move BottomSheet with Keyboard, you ensure:
- Improved Accessibility: Users can see the TextField and type without obstruction.
- Enhanced User Experience: Avoiding layout breaks creates a fluid interaction.
The goal is to ensure the BottomSheet moves effortlessly with the keyboard whenever a TextField gains focus.
Key Components for Flutter Move BottomSheet with Keyboard
- isScrollControlled: Allows the BottomSheet to expand when the keyboard appears.
- MediaQuery.of(context).viewInsets: Dynamically adjusts padding to account for keyboard height.
- SingleChildScrollView: Prevents content overflow when the BottomSheet’s size changes.
Step-by-Step Implementation
1. Basic Implementation
Here’s how to create a BottomSheet that moves with the keyboard:
import 'package:flutter/material.dart';

void main() {

  runApp(MyApp());

}

class MyApp extends StatelessWidget {

  const MyApp({super.key});

  @override

  Widget build(BuildContext context) {

    return MaterialApp(

      home: HomePage(),

    );

  }

}

class HomePage extends StatelessWidget {

  const HomePage({super.key});

  @override

  Widget build(BuildContext context) {

    return Scaffold(

      appBar: AppBar(

        title: Text('BottomSheet with TextField'),

      ),

      body: Center(

        child: ElevatedButton(

          onPressed: () => _showBottomSheet(context),

          child: Text('Show BottomSheet'),

        ),

      ),

    );

  }

  void _showBottomSheet(BuildContext context) {

    showModalBottomSheet(

      context: context,

      isScrollControlled: true, // Allows BottomSheet to resize with the keyboard

      builder: (BuildContext context) {

        return Padding(

          padding: MediaQuery.of(context).viewInsets, // Adjusts for keyboard height

          child: Container(

            padding: EdgeInsets.all(16.0),

            child: Column(

              mainAxisSize: MainAxisSize.min, // Dynamic height adjustment

              children: [

                TextField(

                  decoration: InputDecoration(labelText: 'Enter your message'),

                ),

                SizedBox(height: 20),

                ElevatedButton(

                  onPressed: () => Navigator.of(context).pop(),

                  child: Text('Close'),

                ),

              ],

            ),

          ),

        );

      },

    );

  }

}
Output:
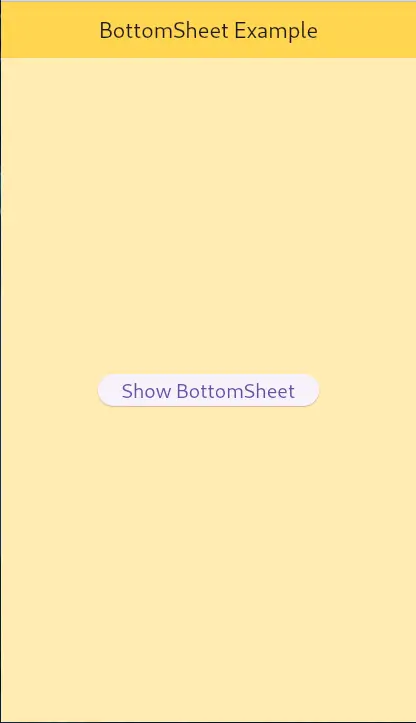
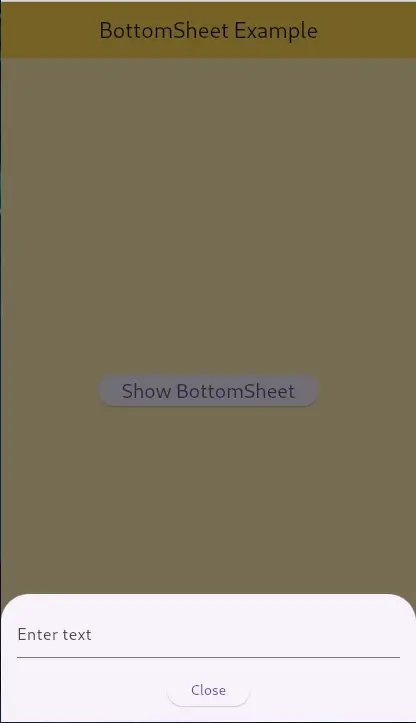
How It Works
- isScrollControlled: true: Ensures the BottomSheet expands dynamically with the keyboard.
- MediaQuery.of(context).viewInsets: Adjusts the BottomSheet’s padding to match the keyboard height.
This straightforward approach ensures that Flutter Move BottomSheet with Keyboard is smooth and responsive.
2. Handling Overflow with Scrollable Content
If the content within the BottomSheet exceeds the screen height, use a SingleChildScrollView to prevent overflow:
child: SingleChildScrollView(

  padding: MediaQuery.of(context).viewInsets,

  child: Column(

    mainAxisSize: MainAxisSize.min,

    children: [

      TextField(

        decoration: InputDecoration(labelText: 'Type something'),

      ),

      SizedBox(height: 20),

      ElevatedButton(

        onPressed: () => Navigator.of(context).pop(),

        child: Text('Close'),

      ),

    ],

  ),

),
This addition ensures a smooth user experience, even with larger BottomSheet content, further enhancing Flutter Move BottomSheet with Keyboard functionality.
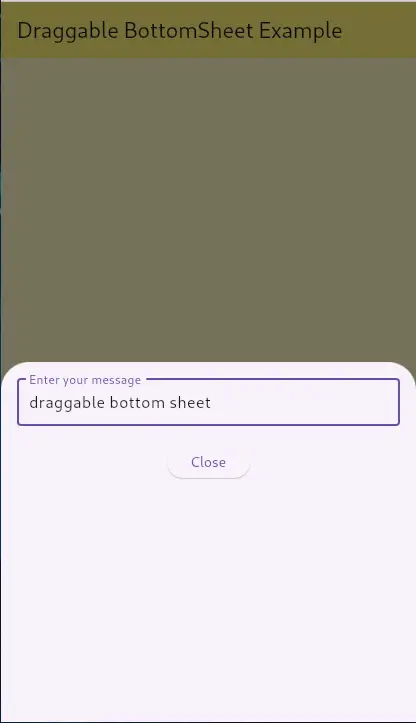
3. Using DraggableScrollableSheet for Advanced Behavior
For enhanced interactivity, use a DraggableScrollableSheet. It allows users to resize the BottomSheet by dragging:
showModalBottomSheet(

  context: context,

  isScrollControlled: true,

  builder: (BuildContext context) {

    return DraggableScrollableSheet(

      expand: false,

      builder: (context, scrollController) {

        return SingleChildScrollView(

          controller: scrollController,

          padding: MediaQuery.of(context).viewInsets,

          child: Container(

            padding: EdgeInsets.all(16.0),

            child: Column(

              children: [

                TextField(

                  decoration: InputDecoration(labelText: 'Enter your message'),

                ),

                SizedBox(height: 20),

                ElevatedButton(

                  onPressed: () => Navigator.of(context).pop(),

                  child: Text('Close'),

                ),

              ],

            ),

          ),

        );

      },

    );

  },

);
Output:

Best Practices for Flutter Move BottomSheet with Keyboard
- Always Use isScrollControlled: This enables the BottomSheet to adapt dynamically.
- Wrap with MediaQuery.of(context).viewInsets: Dynamically handle the keyboard’s height.
- Implement SingleChildScrollView: Prevent overflow issues when the BottomSheet content is large.
- Use resizeToAvoidBottomInset: Ensure the main layout adjusts for the keyboard.
Common Pitfalls and Solutions
- BottomSheet Not Resizing
- Cause: Missing isScrollControlled in showModalBottomSheet.
- Solution: Set isScrollControlled to true.
- TextField Obstructed by Keyboard
- Cause: Padding doesn’t account for keyboard height.
- Solution: Use MediaQuery.of(context).viewInsets for proper adjustment.
- Overflow Errors
- Cause: Content size exceeds available screen space.
- Solution: Wrap content in SingleChildScrollView.
Conclusion
By following the approaches discussed, you can master Flutter Move BottomSheet with Keyboard effortlessly. Whether you use isScrollControlled, MediaQuery, or advanced features like DraggableScrollableSheet, these techniques ensure your BottomSheet interacts seamlessly with the keyboard, offering a polished and professional user experience.
Additional Resources
Links
You can read also: How to Get Assets Image Path In Flutter


