Flutter Extract Widget: A Complete Guide to Using onPressed and setState
in Flutter on December 10, 2024by Kawser MiahFlutter Extract Widget is a powerful technique for refactoring code to improve readability and reusability in your Flutter applications. However, when dealing with buttons or widgets that contain onPressed functions utilizing setState, the extraction process can be challenging. This is because setState is tightly coupled with the State object of a StatefulWidget.This guide provides a comprehensive explanation and practical examples to help you Flutter extract widget effectively while managing onPressed and setState with ease.
Table of Contents
Flutter Extract Widget
Why Extract Widgets with onPressed and setState?
Extracting widgets in Flutter is essential for:
- Code Reusability: Avoid rewriting similar UI components across different screens.
- Code Readability: Make the code cleaner, easier to understand, and maintain.
- Separation of Concerns: Keep UI and logic modular, enhancing maintainability.
However, since setState is inherently tied to the State of a StatefulWidget, managing onPressed logic during a Flutter extract widget process can get complicated. Let’s explore some effective solutions.
Approaches to Extract Widgets with setState
1. Passing Callbacks
A common approach to Flutter extract widget with setState is passing the setState function from the parent widget to the child widget via a callback.
Example: Basic Counter App
import 'package:flutter/material.dart';

class CounterPage extends StatefulWidget {

  const CounterPage({super.key});

  @override

  _CounterPageState createState() => _CounterPageState();

}

class _CounterPageState extends State<CounterPage> {

  int _counter = 0;

  void _incrementCounter() {

    setState(() {

      _counter++;

    });

  }

  @override

  Widget build(BuildContext context) {

    return Scaffold(

      backgroundColor: Colors.purple[100],

      appBar: AppBar(

        backgroundColor: Colors.purple[100],

        title: const Text('Flutter Counter'),

        centerTitle: true,

      ),

      body: Center(

        child: Column(

          mainAxisAlignment: MainAxisAlignment.center,

          children: [

            Text('You have pressed the button $_counter times.',

                style: const TextStyle(fontSize: 20)),

            const SizedBox(height: 20),

            IncrementButton(onPressed: _incrementCounter),

          ],

        ),

      ),

    );

  }

}

class IncrementButton extends StatelessWidget {

  final VoidCallback onPressed;

  const IncrementButton({super.key, required this.onPressed});

  @override

  Widget build(BuildContext context) {

    return ElevatedButton(

      onPressed: onPressed,

      child: const Text('Increment', style: TextStyle(fontSize: 20)),

    );

  }

}
Output:
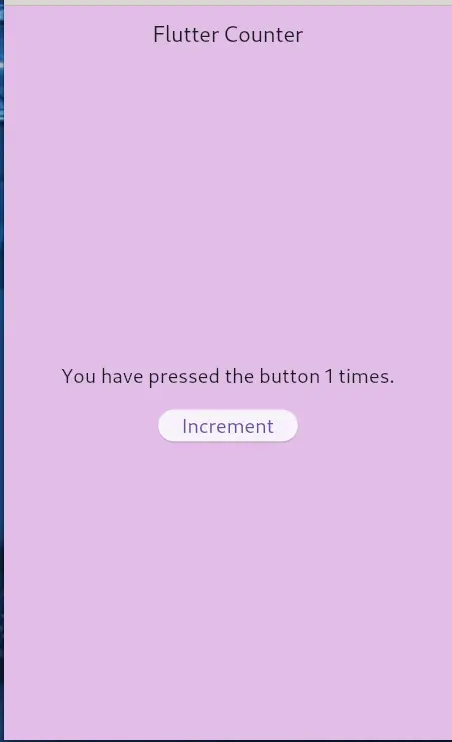
How It Works:
- The IncrementButton widget receives a callback (_incrementCounter) via its onPressed parameter.
- This method ensures setState stays in the parent widget, simplifying state management while allowing you to Flutter extract widget.
2. ValueChanged Callback for Dynamic Changes
Another method is to use ValueChanged to pass data between the parent and child widgets during a Flutter extract widget operation.
Example: Dynamic Color Toggle
class ColorTogglePage extends StatefulWidget {

  const ColorTogglePage({super.key});

  @override

  _ColorTogglePageState createState() => _ColorTogglePageState();

}

class _ColorTogglePageState extends State<ColorTogglePage> {

  Color _backgroundColor = Colors.white;

  void _updateColor(Color color) {

    setState(() {

      _backgroundColor = color;

    });

  }

  @override

  Widget build(BuildContext context) {

    return Scaffold(

      appBar: AppBar(title: const Text('Dynamic Color Toggle')),

      body: Container(

        color: _backgroundColor,

        child: Center(

          child: ColorToggleButton(onColorChange: _updateColor),

        ),

      ),

    );

  }

}

class ColorToggleButton extends StatefulWidget {

  final ValueChanged<Color> onColorChange;

  const ColorToggleButton({super.key, required this.onColorChange});

  @override

  _ColorToggleButtonState createState() => _ColorToggleButtonState();

}

class _ColorToggleButtonState extends State<ColorToggleButton> {

  bool _isBlue = true;

  void _toggleColor() {

    setState(() {

      _isBlue = !_isBlue;

      widget.onColorChange(_isBlue ? Colors.blue : Colors.green);

    });

  }

  @override

  Widget build(BuildContext context) {

    return ElevatedButton(

      onPressed: _toggleColor,

      child: Text(_isBlue ? 'Switch to Green' : 'Switch to Blue'),

    );

  }

}
Output:
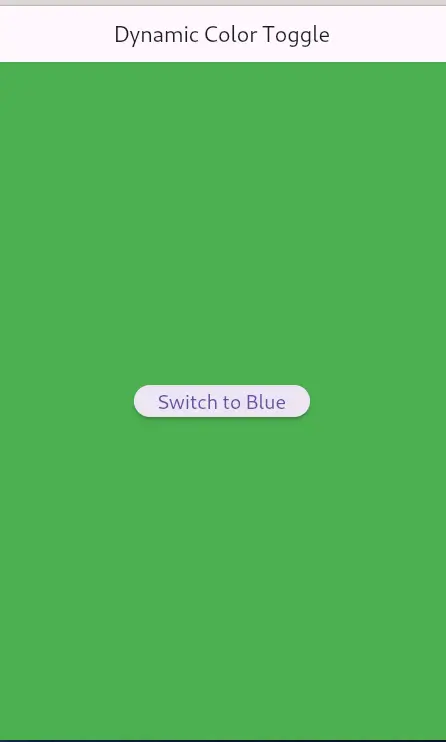
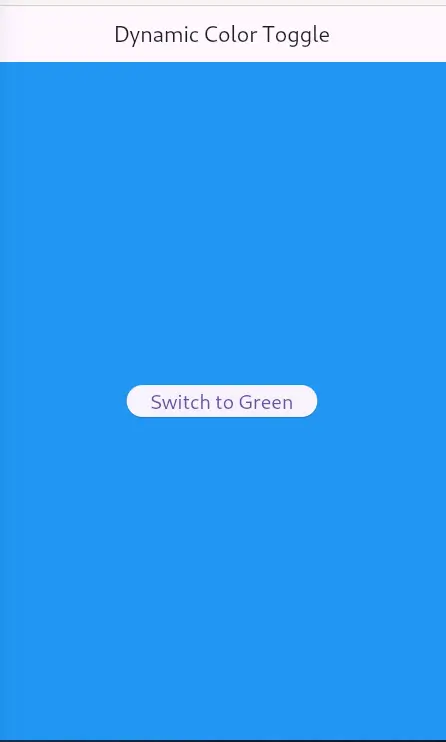
How It Works:
- The parent widget manages the state for the background color, while the child widget manages button text and color changes.
- This separation simplifies the Flutter extract widget process, making both widgets highly reusable and modular.
3. Using StatefulBuilder for Localized State
If you need full control without creating a new StatefulWidget, StatefulBuilder offers an elegant solution.
Example: Counter Widget
class CounterWidget extends StatelessWidget {

  const CounterWidget({super.key});

  @override

  Widget build(BuildContext context) {

    int counter = 0;

    return StatefulBuilder(

      builder: (BuildContext context, void Function(void Function()) setState) {

        return Column(

          mainAxisAlignment: MainAxisAlignment.center,

          children: [

            Text('Counter: $counter', style: const TextStyle(fontSize: 24)),

            const SizedBox(height: 20),

            ElevatedButton(

              onPressed: () {

                setState(() {

                  counter++;

                });

              },

              child: const Text('Increment'),

            ),

          ],

        );

      },

    );

  }

}
Output:
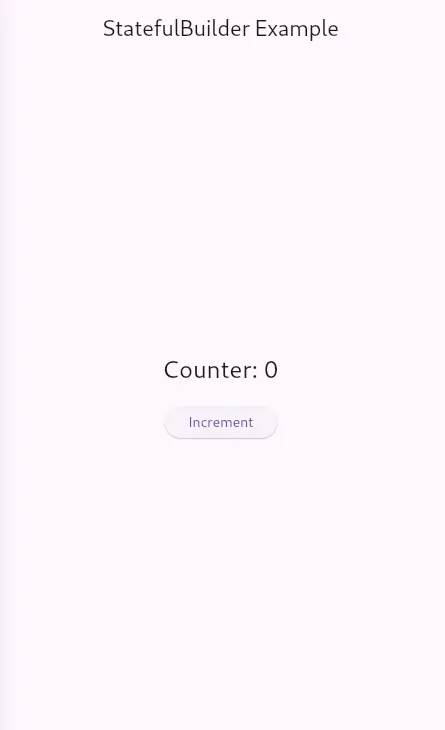
Advantages:
- Localized State: The state is managed within the widget, eliminating the need to pass callbacks.
- Simplified Structure: No separate StatefulWidget class is required, streamlining the Flutter extract widget process.
When to Use Each Approach:

Best Practices for Extracting Widgets
- Keep setState in the Parent: This makes widgets reusable and avoids unnecessary complexity.
- Use State Management Libraries: Consider using Provider, Riverpod, or Flutter Bloc for better scalability.
- Modularize Your Code: Each widget should have a single responsibility to enhance maintainability.
Conclusion
In this guide, we explored different techniques to Flutter extract widget while managing onPressed and setState. Whether you use callbacks, ValueChanged, or StatefulBuilder, selecting the right approach depends on your app’s complexity and requirements.
By following these practices, you can build scalable, maintainable, and modular Flutter applications. Remember, clean code is key to a successful Flutter project, and learning how to Flutter extract widget effectively is a step in that direction!
Additional Resources
Links
You can read also: How to Get Assets Image Path In Flutter

