Flutter Dynamic TabBar Using Bloc: A Professional Guide
in Flutter on September 28, 2024by Kawser MiahThe Flutter Dynamic TabBar Using Bloc is a highly efficient way to handle dynamic navigation within Flutter apps. By combining the power of TabBar for switching between different views and Flutter Bloc for state management, you can create a responsive and organized UI that handles dynamic content with ease. In this guide, we’ll walk you through the essential components of Flutter’s TabBar and Flutter Bloc, showing how they work together to build a professional-grade Flutter Dynamic TabBar Using Bloc system for your app.
Table of Contents
Flutter Dynamic TabBar Using Bloc: A Professional Guide
1. TabBar
Key Components of TabBar in Flutter
The Flutter Dynamic TabBar Using Bloc relies on several key components:
- TabBar: The TabBar itself is a collection of clickable tabs that allow users to switch between views. Each tab can have text, icons, or both, depending on the design requirements. It provides a user-friendly way to navigate between sections within an app without cluttering the screen with multiple buttons.
- TabBarView: The TabBarView is responsible for displaying the content associated with each tab. Every tab is linked to a specific view, and when a tab is selected, its corresponding content is shown. Typically, the TabBarView is placed directly beneath the TabBar, offering a seamless transition between different sections.
- TabController: To synchronize the selection of a tab and the content displayed in the TabBarView, a TabController is used. This controller manages the state and keeps track of which tab is active, ensuring that when a user taps a tab, the appropriate content is displayed.
These components work together to provide a user-friendly navigation system that’s essential for apps with dynamic and diverse content.
Typical Use Cases for TabBar
- Navigation between sections: In apps where content is divided into distinct categories or sections, a TabBar provides a clean and intuitive way to switch between them.
- Scrollable tabs: In scenarios where the number of tabs is large or dynamic, the TabBar can be made scrollable, allowing the user to swipe left or right to access hidden tabs.
Benefits of Using TabBar
- Simple and organized UI: TabBar allows for a compact, organized layout, ideal for apps with multiple categories.
- Consistency: Many apps use tabbed navigation, so users are familiar with the behavior, making it easier to navigate.
- Customizability: Flutter’s TabBar offers extensive customization, from colors and styles to icon placement, ensuring it fits any app’s design language.
2. Flutter Bloc
Key Concepts of Flutter Bloc in Flutter
In a Flutter Dynamic TabBar Using Bloc application, the Flutter Bloc component is critical for managing the state:
- State Management: At its core, Bloc is a state management tool. State refers to the data or information that can change over time in an application (e.g., user input, API responses). Bloc helps in managing these states effectively, ensuring that the UI reacts to any changes in the state.
- Event-Driven: Bloc operates using events and states. An event is something that occurs in the app, like a user clicking a button or data being fetched from a server. When an event occurs, Bloc receives it and triggers the appropriate action to update the state.
- Separation of Concerns: One of the key principles of Bloc is the separation of concerns. Bloc allows you to keep your business logic (data manipulation, API calls) separate from the UI, ensuring that your app remains clean, maintainable, and scalable. The UI only listens to state changes, while the business logic is encapsulated within the Bloc.
- Reactive Programming: Bloc encourages a reactive programming approach. This means that the UI components (like widgets) “react” to state changes. For example, if the state changes due to an event (such as new data being fetched), the UI will automatically update to reflect the new state.
- Reusability: Bloc promotes the idea of reusable components. By separating logic from the UI, you can reuse the same business logic across different parts of the app or even in different apps. This makes development faster and more efficient.
- Testability: Since Bloc helps keep business logic separate from the UI, it’s easier to test the core functionality of the app. The business logic can be tested independently, ensuring the app behaves correctly even before integrating it with the UI.
Typical Use Cases for Flutter Bloc in Flutter
- Managing complex states: Bloc is ideal for apps with dynamic content that changes frequently, such as user authentication, form submission, or data retrieval.
- API calls and data processing: Bloc helps in managing the process of fetching, manipulating, and displaying data from APIs in a structured way.
- Multiple components interacting: When multiple parts of an app need to interact with shared logic (e.g., user settings), Bloc makes it easier to handle these interactions.
Benefits of Using Flutter Bloc
- Organized codebase: By separating logic from the UI, Flutter Bloc keeps the code clean and structured in a Flutter Dynamic TabBar Using Bloc system.
- Testability: With Flutter Bloc, testing becomes easier, especially in dynamic setups like the Flutter Dynamic TabBar Using Bloc.
3. TabBar Example
Example Code
class MyApp extends StatelessWidget {
  const MyApp({super.key});

  @override
  Widget build(BuildContext context) {
    return MaterialApp(
      title: 'coseries.com',
      theme: ThemeData(
        colorScheme: ColorScheme.fromSeed(seedColor: Colors.deepPurple),
        useMaterial3: true,
      ),
      home: MultiBlocProvider(
        providers: [
          BlocProvider(
              create: (context) =>
                  CategoryBloc()..add(const CategoryEvent.started()))
        ],
        child: BlocBuilder<CategoryBloc, CategoryState>(
          builder: (context, state) {
            if (state is CategoryLoadedState) {
              return MyHomePage(
                title: 'Coseries',
                category: state.category,
              );
            }
            return Scaffold(
              appBar: AppBar(
                backgroundColor: Theme.of(context).colorScheme.inversePrimary,
                title: const Text('Coseries'),
                centerTitle: true,
              ),
              body: const Center(
                child: CircularProgressIndicator(),
              ),
            );
          },
        ),
      ),
    );
  }
}

class MyHomePage extends StatefulWidget {
  const MyHomePage({super.key, required this.title, required this.category});
  final String title;
  final CategoryModel category;

  @override
  State<MyHomePage> createState() => _MyHomePageState();
}

class _MyHomePageState extends State<MyHomePage> with TickerProviderStateMixin {
  late TabController controller;

  @override
  void initState() {
    // TODO: implement initState
    super.initState();

    controller = TabController(
        length: widget.category.results!.length, vsync: this, initialIndex: 0);
  }

  @override
  Widget build(BuildContext context) {
    return DefaultTabController(
      length: widget.category.results!.length,
      child: Scaffold(
        appBar: AppBar(
          backgroundColor: Theme.of(context).colorScheme.inversePrimary,
          title: Text(widget.title),
          centerTitle: true,
        ),
        body: Container(
          padding: const EdgeInsets.all(8),
          child: Column(
            mainAxisAlignment: MainAxisAlignment.start,
            crossAxisAlignment: CrossAxisAlignment.start,
            children: <Widget>[
              TabBar(
                  dividerColor: Colors.transparent,
                  isScrollable: true,
                  controller: controller,
                  tabs: widget.category.results!
                      .map((e) => Tab(
                            child: Text("${e.category}"),
                          ))
                      .toList()),
              Expanded(
                child: TabBarView(
                    controller: controller,
                    children: widget.category.results!
                        .map((e) => QuestionPage(
                              id: e.id!,
                            ))
                        .toList()),
              )
            ],
          ),
        ),
        // This trailing comma makes auto-formatting nicer for build methods.
      ),
    );
  }
}
Here’s a breakdown of how to implement a Flutter Dynamic TabBar Using Bloc:
1. State Class: _MyHomePageState
This class manages the state for the MyHomePage widget and implements the logic for the TabBar.
- Mixin with TickerProviderStateMixin:
- The mixin allows the widget to manage animations, specifically the TabController which requires a ticker for animation.
- TabController (controller):
- A TabController is created to manage the tabs and the corresponding content displayed when a tab is selected.
- length: The number of tabs is set to the length of the results list inside widget.category, meaning the number of tabs dynamically depends on the data inside category.
- vsync: The TickerProviderStateMixin is passed to synchronize the animation.
- initialIndex: Sets the initial tab to the first tab (index 0).
2. initState() Method
- This method initializes the TabController when the widget is first created.
- It is set to have the same number of tabs as there are results in the category.
3. build() Method
This method builds the UI for the page using the Scaffold widget, with the main components being an AppBar, TabBar, and TabBarView.
- DefaultTabController:
- Wraps the entire scaffold, but note that the TabController used here is defined manually (controller), so DefaultTabController is not strictly necessary but provides an outer layer for convenience.
- AppBar:
- Displays the title (widget.title) at the center.
- Uses the app’s theme for background styling.
- TabBar:
- Positioned at the top of the content section.
- isScrollable: Makes the TabBar scrollable if the number of tabs exceeds the screen width.
- controller: The TabController is passed to the TabBar for managing which tab is selected.
- tabs: A dynamic list of tabs is created based on the category.results!. Each tab displays the text from the category field of the result.
- TabBarView:
- Displays the content associated with each tab.
- controller: Same TabController is passed to synchronize the view with the selected tab.
- children: A list of QuestionPage widgets is created, one for each item in the category.results!. The id of each result is passed to QuestionPage, indicating that the content in each tab is unique and tied to its id.
In this example, the number of tabs is dynamic, making the Flutter Dynamic TabBar Using Bloc system ideal for applications where content varies.
4. Tab Bloc Example (Category Bloc)
Category Event
import 'package:freezed_annotation/freezed_annotation.dart';
part 'category_event.freezed.dart';
@freezed
class CategoryEvent with _$CategoryEvent {
  const factory CategoryEvent.started() = _Started;
}
//Flutter Dynamic TabBar Using Bloc
Category State
import 'package:freezed_annotation/freezed_annotation.dart';
import '../model/categoryModel.dart';
part 'category_state.freezed.dart';
@freezed
class CategoryState with _$CategoryState {
  const factory CategoryState.initial() = _Initial;
  const factory CategoryState.loading() = CategoryLoadingState;
  const factory CategoryState.error() = CategoryErrorState;
  const factory CategoryState.loaded({required CategoryModel category}) = CategoryLoadedState;

}
//Flutter Dynamic TabBar Using Bloc
Category Bloc
import 'package:flutter_bloc/flutter_bloc.dart';
import '../datasources/remote_datasources.dart';
import 'category_event.dart';
import 'category_state.dart';
class CategoryBloc extends Bloc<CategoryEvent, CategoryState> {
  final RemoteDataSources remoteDataSources = RemoteDataSources();
  CategoryBloc() : super(const CategoryState.initial()) {
    on<CategoryEvent>((event, emit) async {
      try {
        final response = await remoteDataSources.getCategoryFromRemoteServer();
        emit(CategoryLoadedState(category: response));
      } catch (e) {}
    });
  }
}
//Flutter Dynamic TabBar Using Bloc
Let’s break down the code:
To further enhance the Flutter Dynamic TabBar Using Bloc setup, we use Flutter Bloc to manage category data dynamically:
1. Class Definition: CategoryBloc
The CategoryBloc class extends Bloc<CategoryEvent, CategoryState>. This means:
I.CategoryEvent: Represents the different events that this bloc will respond to (though they’re not explicitly defined here).
II.CategoryState: Represents the various states the application can be in during the category-loading process.
Bloc operates by reacting to incoming events and emitting new states, which the UI can listen to and update accordingly.
2. RemoteDataSources
- An instance of RemoteDataSources is created as remoteDataSources. This is likely a service or helper class that is responsible for fetching data from a remote API (e.g., using HTTP requests).
- remoteDataSources.getCategoryFromRemoteServer() is the method that interacts with the server to retrieve the category data.
3. Constructor: CategoryBloc()
- The constructor calls the parent Bloc class constructor with an initial state CategoryState.initial(), which likely represents the default or starting state of the bloc. This is a standard pattern to initialize the bloc with an empty or initial state.
4. Event Handling
- on
((event, emit) async { … }): This is how the Bloc listens for CategoryEvent events and responds. - The on<Event> function is a built-in way to register event handlers for the Bloc.
- When a CategoryEvent occurs, the handler is executed asynchronously (async), meaning it can wait for an asynchronous operation like an API call.
5. Fetching Data and Emitting State
- Inside the on
handler: - Remote API Call: final response = await remoteDataSources.getCategoryFromRemoteServer();
This line makes an asynchronous request to fetch the category data from a remote server. - Emitting State: emit(CategoryLoadedState(category: response)); Once the data is successfully fetched, the CategoryLoadedState is emitted, which contains the fetched category data (response). This new state signals to the UI (or other parts of the app) that the category data is now available.
- Remote API Call: final response = await remoteDataSources.getCategoryFromRemoteServer();
6. Error Handling
- The try-catch block is used for basic error handling:
- If an error occurs during the API call, it will be caught in the catch (e) {} block. However, the catch block is currently empty, meaning no error handling or state changes occur if something goes wrong.
- In a more complete implementation, you’d typically emit an error state like CategoryErrorState or log the error.
This approach ensures that your Flutter Dynamic TabBar Using Bloc solution is scalable and adaptable to different content types.
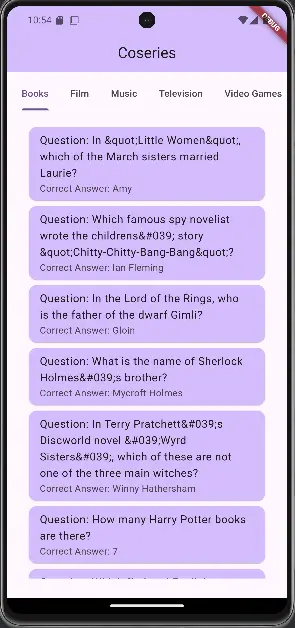
Output
5. Tabbar View Page AND Bloc
Tabbar Page Bloc(Question Bloc)
Question Event
import 'package:freezed_annotation/freezed_annotation.dart';
part 'question_event.freezed.dart';
@freezed
class QuestionEvent with _$QuestionEvent {
  const factory QuestionEvent.started({required int id}) = _Started;
}
//Flutter Dynamic TabBar Using Bloc
Question State
import 'package:freezed_annotation/freezed_annotation.dart';
import '../model/QuestionModel.dart';
part 'question_state.freezed.dart';
@freezed
class QuestionState with _$QuestionState {
  const factory QuestionState.initial() = _Initial;
  const factory QuestionState.loading() = QuestionLoadingState;
  const factory QuestionState.error() = QuestionErrorState;
  const factory QuestionState.loaded({required QuestionModel question}) =
      QuestionLoadedState;
}
//Flutter Dynamic TabBar Using Bloc
Question Bloc
import 'package:flutter_bloc/flutter_bloc.dart';
import '../datasources/remote_datasources.dart';
import 'question_event.dart';
import 'question_state.dart';
class QuestionBloc extends Bloc<QuestionEvent, QuestionState> {
  final RemoteDataSources remoteDataSources = RemoteDataSources();
  QuestionBloc() : super(const QuestionState.initial()) {
    on<QuestionEvent>((event, emit) async {
      emit(const QuestionLoadingState());
      try {
        final response =
            await remoteDataSources.getQuestionFromRemoteServer(event.id);
        emit(QuestionLoadedState(question: response));
      } catch (e) {
        emit(const QuestionErrorState());
      }
    });
  }
}
//Flutter Dynamic TabBar Using Bloc
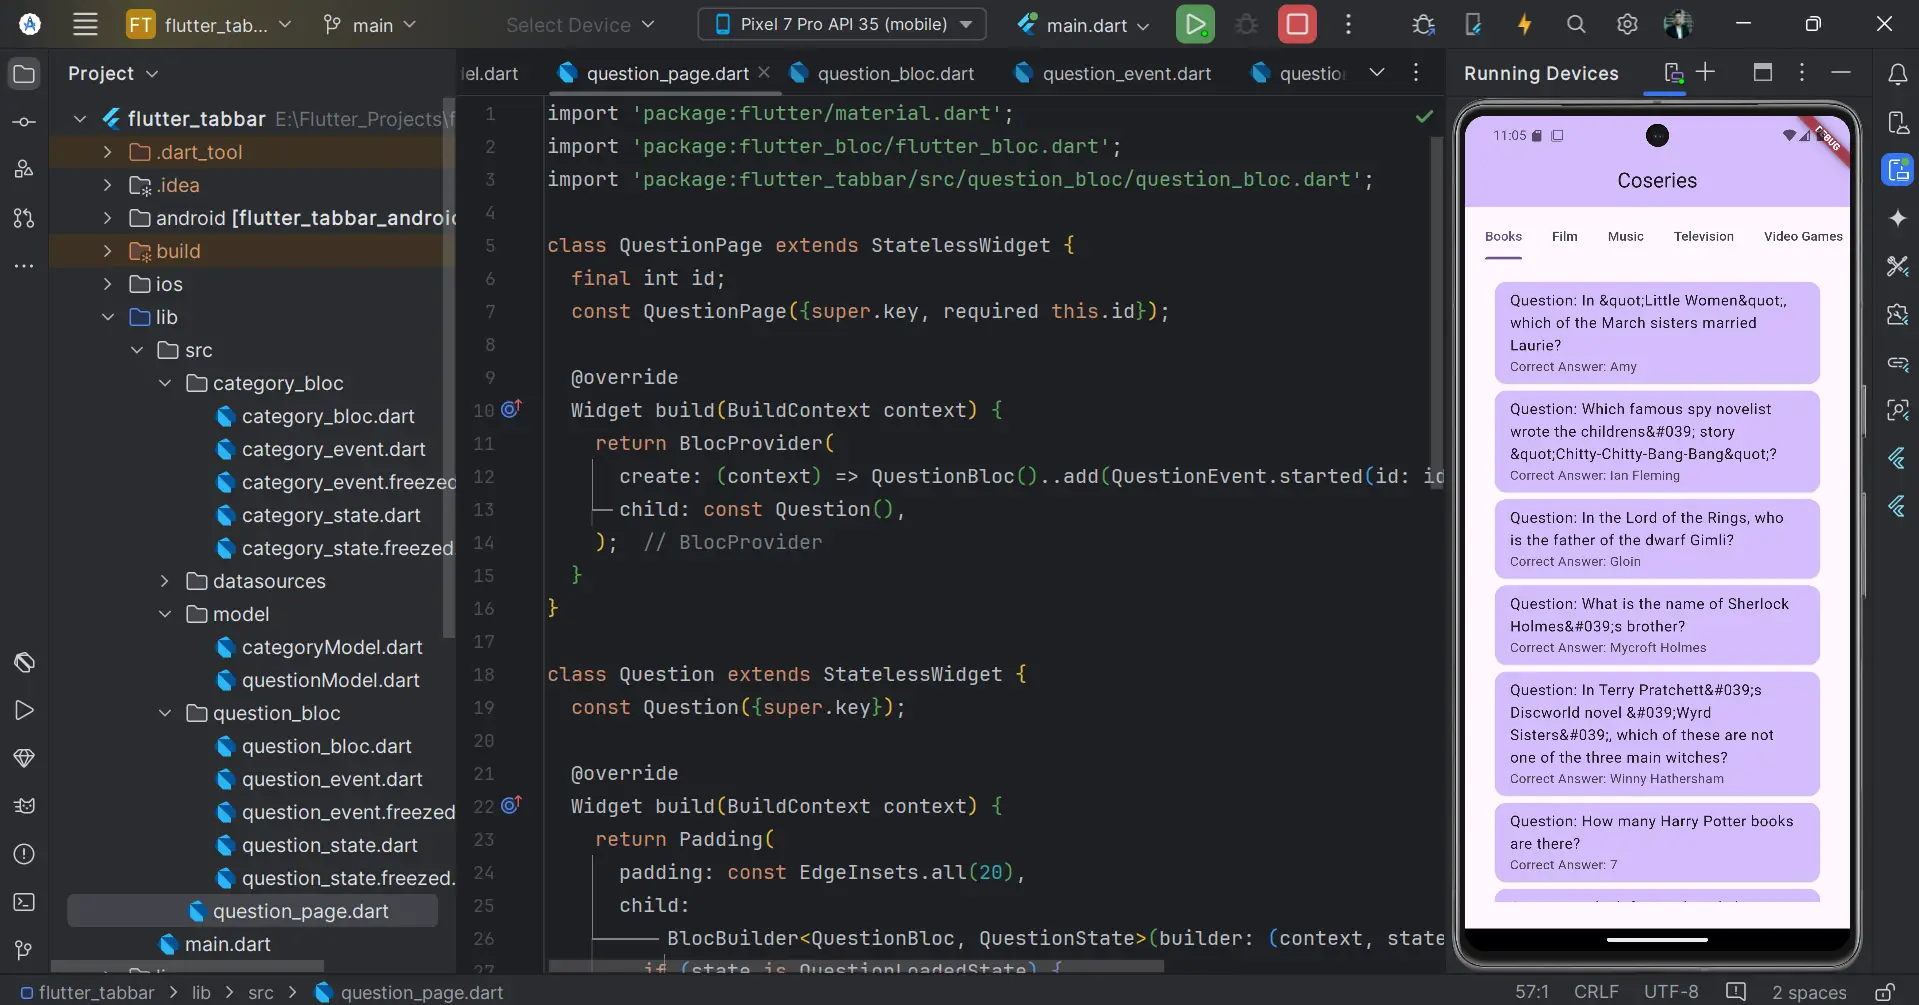
Tabbar View Page
class QuestionPage extends StatelessWidget {
  final int id;
  const QuestionPage({super.key, required this.id});

  @override
  Widget build(BuildContext context) {
    return BlocProvider(
      create: (context) => QuestionBloc()..add(QuestionEvent.started(id: id)),
      child: const Question(),
    );
  }
}

class Question extends StatelessWidget {
  const Question({super.key});

  @override
  Widget build(BuildContext context) {
    return Padding(
      padding: const EdgeInsets.all(20),
      child:
          BlocBuilder<QuestionBloc, QuestionState>(builder: (context, state) {
        if (state is QuestionLoadedState) {
          return ListView.builder(
              itemCount: state.question.results?.length,
              itemBuilder: (context, index) {
                return Card(
                  color: Theme.of(context).colorScheme.inversePrimary,
                  child: ListTile(
                    title: Text(
                        "Question: ${state.question.results?[index].question}"),
                    subtitle: Text(
                        "Correct Answer: ${state.question.results?[index].correctAnswer}"),
                  ),
                );
              });
        } else if (state is QuestionLoadingState) {
          return const Center(
            child: CircularProgressIndicator(),
          );
        } else if (state is QuestionErrorState) {
          return const Center(
            child: Text("Question Not Found...!"),
          );
        }
        return const Center(
          child: CircularProgressIndicator(),
        );
      }),
    );
  }
}
//Flutter Dynamic TabBar Using Bloc
Output
6. Conclusion
Implementing a Flutter Dynamic TabBar Using Bloc setup allows developers to create highly customizable, scalable, and maintainable applications. The combination of TabBar for dynamic navigation and Flutter Bloc for state management provides a seamless way to handle dynamic content. Whether you’re building a simple app or a complex one with multiple views, using Flutter Dynamic TabBar Using Bloc ensures a clean, organized structure that enhances user experience. Start incorporating these techniques into your app development process to take full advantage of Flutter’s robust navigation and state management capabilities.
7. Additional Resources
Links
– Official Documentation Tabbar Class
– Official Documentation Flutter Bloc
You can read also: Common Issues and Effective Solutions On Column Overflow

