Cached Network Image Flutter is a powerful technique for handling images in mobile applications. Displaying images from the internet is a common task in many apps, and while Flutter makes this process straightforward, there are several considerations to keep in mind, such as performance optimization, error handling, and managing loading states. This article provides a comprehensive guide on how to implement network images in Flutter, covering all possible scenarios and potential issues, including using the Cached Network Image Flutter approach for better performance.
Table of Contents
Cached Network Image Flutter
1. Introduction to NetworkImage in Flutter
Flutter provides the NetworkImage class, which displays images from the internet. This can be particularly useful when building apps that require dynamic content, such as social media feeds, e-commerce platforms, or news applications.
2. Basic Implementation of a Network Image
To display an image from the internet, you can use the Image.network constructor. Here’s a simple example:
import 'package:flutter/material.dart';


void main() {
 runApp(MyApp());
}


class MyApp extends StatelessWidget {
 @override
 Widget build(BuildContext context) {
   return MaterialApp(
     home: Scaffold(
       appBar: AppBar(title: Text('Network Image Example')),
       body: Center(
         child: Image.network(
          //Add your selected image url
           'https://example.com/your-image-url.jpg',
         ),
       ),
     ),
   );
 }
}
In this example, Image.network fetches and displays an image from the specified URL. The image is loaded and displayed automatically.
3. Handling Loading and Error States
Loading images from the network can occasionally fail due to various reasons, such as connectivity issues or an invalid URL. To handle these situations gracefully, you can use the loadingBuilder and errorBuilder properties
Loading State Handling
The loadingBuilder property allows you to display a placeholder while the image is being loaded:
Image.network(
 'https://example.com/your-image-url.jpg',
 loadingBuilder: (BuildContext context, Widget child, ImageChunkEvent? loadingProgress) {
   if (loadingProgress == null) {
     return child;
   } else {
     return Center(
       child: CircularProgressIndicator(
         value: loadingProgress.expectedTotalBytes != null
             ? loadingProgress.cumulativeBytesLoaded / (loadingProgress.expectedTotalBytes ?? 1)
             : null,
       ),
     );
   }
 },
)
In this example, a CircularProgressIndicator is displayed while the image is loading. The progress indicator updates based on the loading progress.
Error Handling
To handle errors, use the errorBuilder property:
Image.network(
 'https://example.com/your-image-url.jpg',
 errorBuilder: (BuildContext context, Object error, StackTrace? stackTrace) {
   return Center(
     child: Icon(
       Icons.error,
       color: Colors.red,
     ),
   );
 },
)
Here, if the image fails to load, an error icon is displayed instead of the broken image. This ensures your app remains user-friendly, even when errors occur.
4. Caching Network Images with Cached Network Image Flutter
Fetching images from the internet every time they are needed can be inefficient. To optimize performance, you can use the cached network image Package approach, which automatically caches images once they are downloaded.
Adding the Package
First, add the cached_network_image package to your pubspec.yaml file:
dependencies:
  cached_network_image: ^3.4.1
Then, run flutter pub get to install the package.
Using CachedNetworkImage
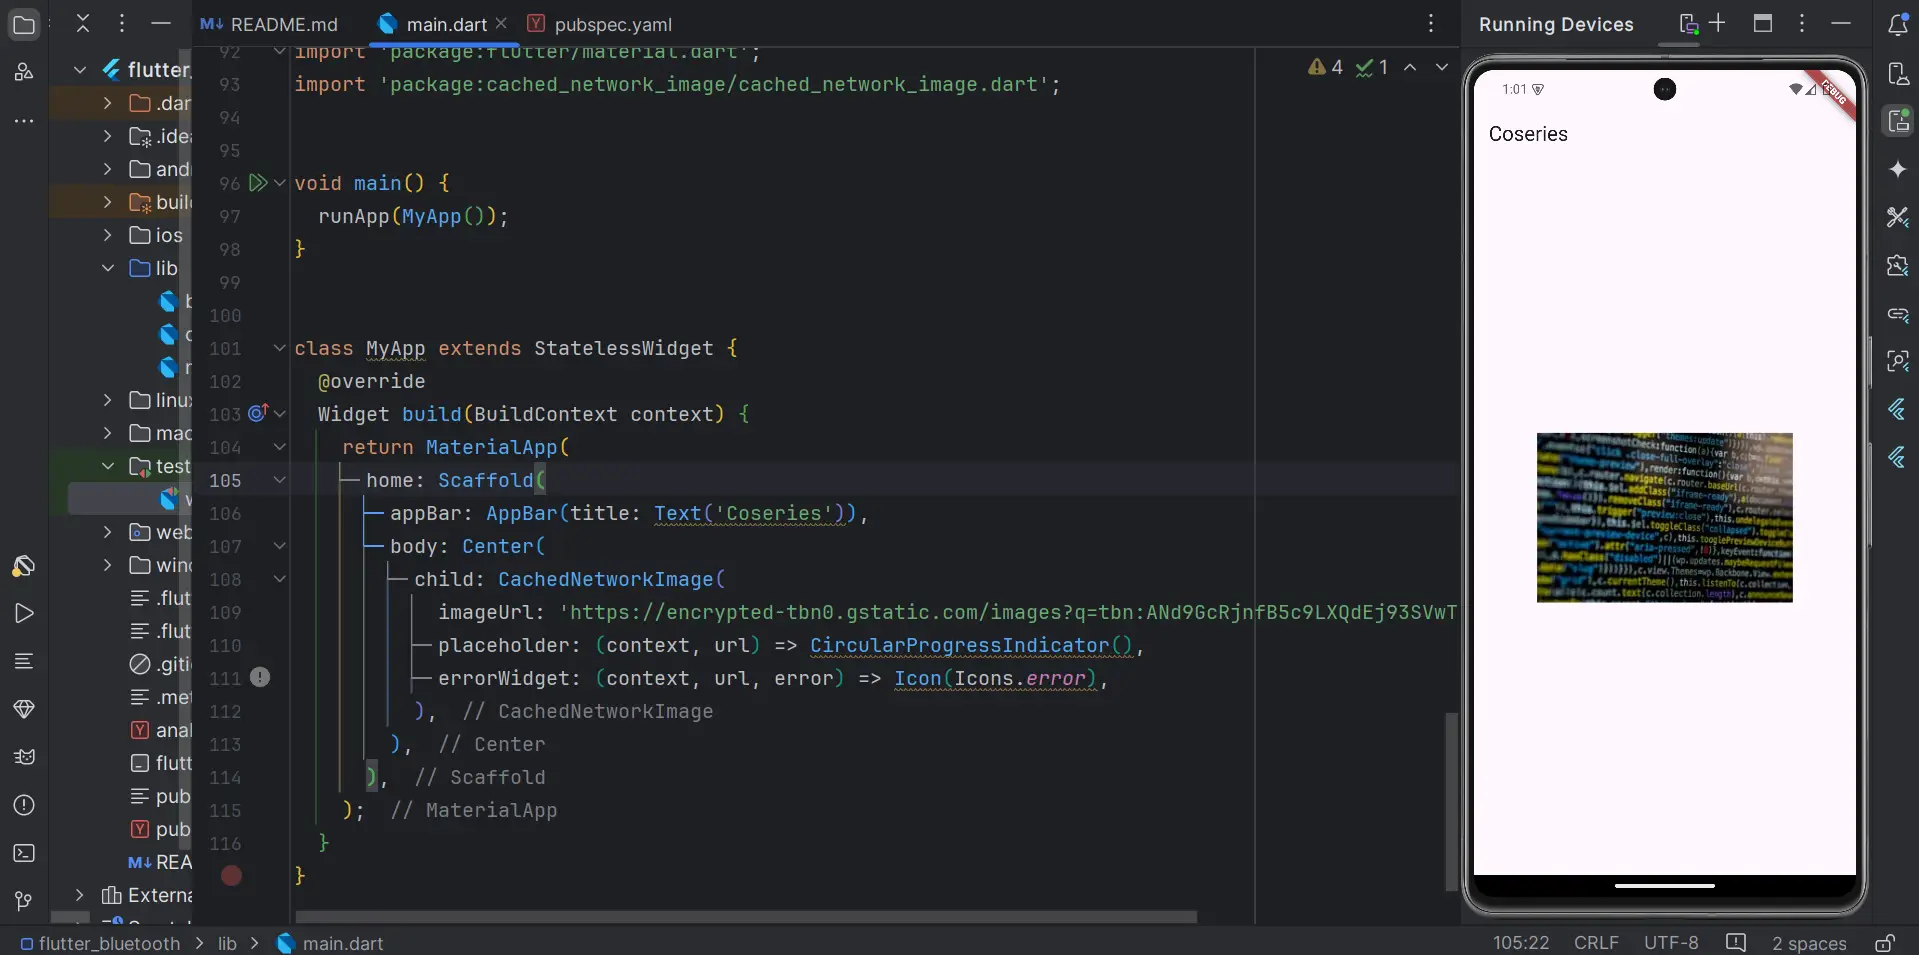
Here’s how you can implement CachedNetworkImage:
import 'package:flutter/material.dart';
import 'package:cached_network_image/cached_network_image.dart';


void main() {
 runApp(MyApp());
}


class MyApp extends StatelessWidget {
 @override
 Widget build(BuildContext context) {
   return MaterialApp(
     home: Scaffold(
       appBar: AppBar(title: Text('Cached Network Image Flutter Example')),
       body: Center(
         child: CachedNetworkImage(
           imageUrl: 'https://example.com/your-image-url.jpg',
           placeholder: (context, url) => CircularProgressIndicator(),
           errorWidget: (context, url, error) => Icon(Icons.error),
         ),
       ),
     ),
   );
 }
}
With cached network image Flutter, the images are cached locally, which reduces loading times and improves app performance. The placeholder and errorWidget parameters allow you to handle loading and error states as well.
Output :

5. Performance Optimization Tips
Use Proper Image Resolutions: Ensure that the images you fetch from the internet are appropriately sized for your app to avoid unnecessarily large downloads.
Use Lazy Loading: For lists of images, consider using ListView.builder to only load images when they come into view.
Consider Image Compression: Compress images on the server side to reduce their file size, leading to faster load times and less data usage.
Leverage Cached Network Image Flutter: Using the cached network image Flutter method, you can significantly enhance the performance of your app by minimizing network requests and reducing latency.
6. Advanced Error Handling and Logging
In production apps, it’s important to log errors for further analysis. You can integrate logging into the errorBuilder:
Image.network(
 'https://example.com/your-image-url.jpg',
 errorBuilder: (BuildContext context, Object error, StackTrace? stackTrace) {
   // Log the error
   print('Error loading image: $error');
   return Center(
     child: Icon(
       Icons.error,
       color: Colors.red,
     ),
   );
 },
)
By logging errors, you can monitor and debug issues related to image loading in your app.
7. Conclusion
Implementing network images in Flutter is a fundamental task that requires careful consideration of loading states, error handling, and performance optimization. By following this comprehensive guide and leveraging the cached network image Flutter method, you can ensure that your app handles network images gracefully and efficiently.
Whether you are building a social media feed, an e-commerce platform, or any app that relies on dynamic content, mastering the use of network images in Flutter will significantly enhance your development process and the user experience.
8. Additional Resources
8.1. Links
You can read also: A Complete Guide to Implementation To Full Screen Dialog


