JavaScript is an event-driven programming language. Most of the JavaScript code is executed in response to the events that happen in the browser. Events in JavaScript are the actions performed by the user such as button clicks, or scroll of the page or the submission of a form, and more.
Events make a program or application interactive. We see the use of events everywhere in desktop, mobile, and web applications. In this article, we are going to Learn all about JavaScript Events in one article.
JavaScript Events
Events are what allows us to run some code when an action happens. Take, for example, if a user clicks a button then you want to display a popup, or when a user submits a form, you want to display a thank you alert. These are all possible through event handling.
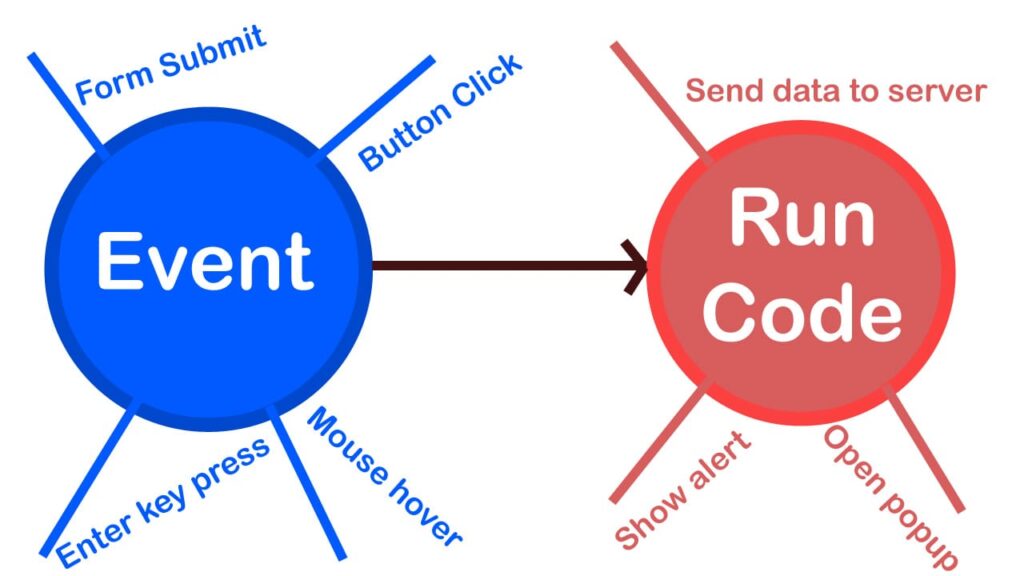
Without events, we would have no idea when to systematically run the code based on actions. JavaScript has event listeners and handlers that all make it possible. Also, whenever events happen or are created, it is termed as “fired” or “triggered”.
Common events in JavaScript
1. click
Whenever a mouse click is made, this event is fired. It is mostly used to handle button clicks.
2. keydown
Whenever a user clicks a key on the keyboard, this event is triggered. It is used to navigate and also used a lot in HTML 5 games.
3. input
This event is triggered whenever a user modifies the value of an input, textarea, or some other form element.
4. submit
Submit event is fired whenever the form submit button is clicked. It is used to get the data from the forms and do further processing. We can use it to fetch some data or store some data using ajax and prevent the browser from refreshing.
5. load
This event is used for asynchronous things. Examples include waiting for some code to run until all the HTML has loaded.
Event handlers in JavaScript
Event handlers/listeners are just functions that run some code when an event is fired. We have to attach event handlers, to some event. Also, each HTML element can have its own set of events that are isolated from other HTML elements.
For example, a button element may have click, mouseover, and other related events that are allowed for a button. The same goes for div and other elements.
We can handle events in javascript using two methods.
- First is by using the inline events that append “on” before the event name like onclick, onchange, etc. to attach the event listener.
- Second, is by using the standard .addEventListener() method on the HTML element.
It is recommended to use addEventListener() because it gives you more control like event capturing and adding multiple events.
Inline Events in JavaScript
With inline events, we can directly add event listeners from the HTML code. We can either use a function defined inline inside the attribute that starts with “on” or uses a function defined in the script file. This code shows a button that changes the background color of the body to yellow on clicking it.
    <body>
        <button onclick="document.body.style.backgroundColor='yellow';">
            Change Body Color
        </button>
    </body>
We see that we can run javascript code right in the onclick attribute. However, if we want to separate the code to a function in javascript then we can do this:
JavaScript Code
    function changeColor() {
        document.body.style.backgroundColor = 'yellow'
    }
HTML Code
    <body>
        <button onclick="changeColor()">
            Change Body Color
        </button>
    </body>
    <script src="test.js"></script>
This will give us the same result. The benefit of separating the code into its file is that you will be able to more organize and reuse your functions.
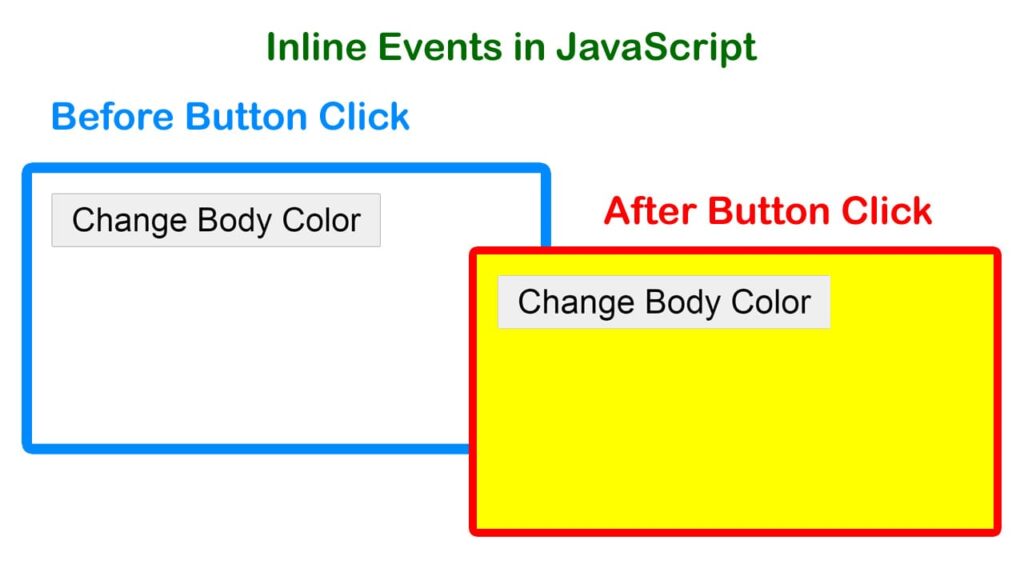
The onclick event that was shown in the example can be any other event like onsubmit or onchange event on a form or input.
We can also specify the inline event property right from the javascript code instead of defining the attribute in the HTML code.
    const btn = document.getElementById('btn')

    // the inline event listener.
    // It actually updates the onclick attribute of the HTML element
    btn.onclick = function(){
        document.body.style.backgroundColor = 'yellow'
    }
If you try to add two onclick listeners then the previous one will be replaced by the one that is defined next. This can be overcome by using the addEventListener() method.
The addEventListener method
The signature of addEventListener() is:
addEventListener(‘eventName’, eventHandler, [useCapture = false])
The one difference here is that instead of the event name being, onclick, onkeydown, onchange, etc, it just needs to be “click”, “keydown”, “change”. It just omits the “on” prefix and uses the event name as it is.
The second argument is for the event handler which is a function that will run when the event is fired.
The third argument is related to the concept of event capturing that runs the handler if the same event listener is present on its parent element.
This example below shows the same output to change the body color but it uses addEventListener.
HTML Code
    <body>
        <button id="btn">
            Change Body Color
        </button>
    </body>
    <script src="test.js"></script>
JavaScript Code
    const btn = document.getElementById('btn')

    // the event listener
    btn.addEventListener('click', changeColor)

    function changeColor() {
        document.body.style.backgroundColor = 'yellow'
    }
The addEventListener can attach multiple same events to an element. This is not the case with inline events because it is an attribute as a property. So, it is replaced by the new one that is defined later.
The Event Object
An event object is a special object that is passed to every event handler. It stores the details of the event that occurred and also has many useful options to control how the event should behave.
In javascript, the event object is always passed as the first argument of the event handler. Default naming conventions like “e”, “event” are used for the event object.
    const btn = document.getElementById('btn')

    // the event listener
    btn.addEventListener('click', function (e) {
        console.log(e)
        /*
        MouseEvent {isTrusted: true, screenX: 1457, screenY: 145, clientX: 72, clientY: 14, …}
        */
        document.body.style.backgroundColor = 'yellow'
    })
It has useful properties that are worth taking a look at:
1. e.target
This returns the DOM node/element where the event occurred. This is useful when you want to use the same event handler for multiple elements.
2. e.type
It returns the name of the event that was fired. Useful to reuse a function for different events that are related. It can then be used to check and run code based on different events.
3. Position where the event occurred
There are six properties you can use to find the mouse coordinate position where the event occurred.
- e.clientX
- e.clientY
- e.pageX
- e.pageY
- e.screenX
- e.screenY
4. e.preventDefault()
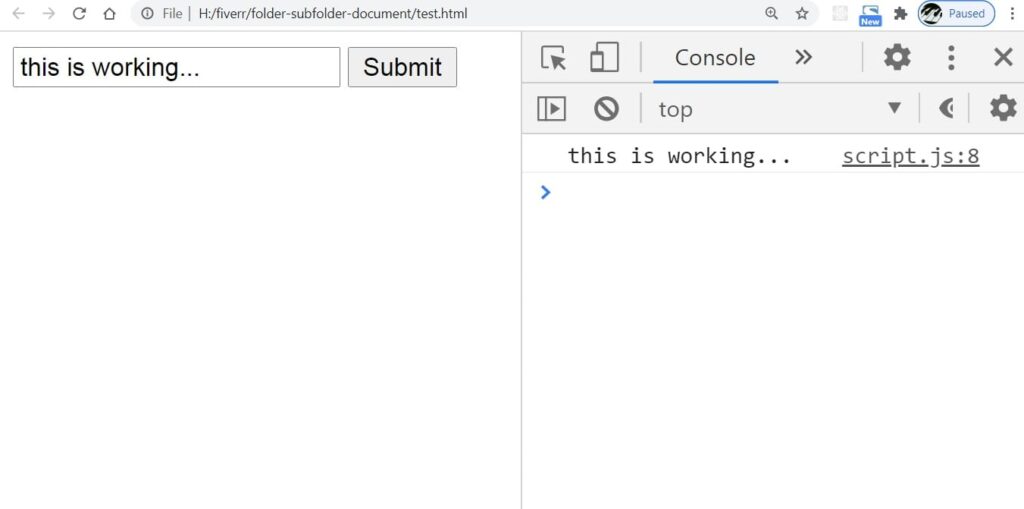
This property is useful to stop the default behavior of a browser. One common use is to call it in a form to submit events, which prevents the default behavior of the browser and stops the page from refreshing.
5. e.stopPropagation()
This is useful when you don’t want the parent element’s event listener to run that has the same type as the current event. It is related to the concept of event bubbling. Here is a submit event handling example using e.preventDefault()
HTML Code
    <body>
        <form id='form'>
            <input id='text' type='text'>
            <button>Submit</button>
        </form>
    </body>
    <script src="script.js"></script>
JavaScript Code
    const form = document.getElementById('form')
    const text = document.getElementById('text')

    form.addEventListener('submit', e => {
        // stops the browser from refreshing the page
        e.preventDefault()
        // log the text input value
        console.log(text.value)
    })
Browser Output
Conclusion
Event handling is essential to understand if we want to add interactivity with javascript. We have discussed the important concepts related to events and you are now equipped to move forward in your journey of understanding events in javascript.


